Year 8 Lessons - Term 2
( if you miss the lesson for any reason you should still complete both classwork and homework)
(***note that some classes are still to complete Term 1 Lesson 6 work, and will be asked to do so over the coming term)
Lesson 1
Classwork : This is a swap-over lesson.
The half of the class that has completed the collage painting will swap to photography for the next 7 lesson and complete the ‘Powerful Portraits’ photography project. Follow the link below to access these 7 lessons.
The other half of the class will spend the Lessons 1 - 7 completing the collage painting.
Homework: Complete drawing the outlines of the wrappers (no details). Photographers follow the homework instructions following the link above.
Deadline : The deadline will always be your next Art lesson unless stated otherwise on MILK.
Lesson 2
Classwork : Students watch the “Collage Drawing - Common Mistakes’ video below and then accurately (using guidelines) draw the lettering of one or two wrappers in class. The techniques of measuring, guidelines and ghosting should be used to draw out the details and lettering for teach object. Again remember everything is being enlarged by 1.5 times.
Collage Drawing - Common Mistakes
Homework: Complete drawing the details of all collage items. Also bring in paints and brushes.
Deadline : The deadline will always be your next Art lesson unless stated otherwise on MILK.
Lesson 3
Classwork : Students watch the ‘Collage Painting - Common Mistakes’ video below. Aim to complete painting one wrapper in class. Aim to paint a simple wrapper, for example one with large lettering and just two flat colours.
Collage Painting - Common Mistakes
Homework : Aim to complete painting a second collage item, but you will be told in the lesson what to paint (concentrating on the simple objects first).
Deadline : The deadline will always be your next Art lesson unless stated otherwise on MILK.
Lesson 4
Classwork : Students will now hopefully be ready to start painting the third collage item, choosing progressively more difficult items. Students should watch the ‘Collage Painting Skills 2’ video below. After lesson 9 students have 3 lessons (Lessons 10, 11 and 12) to complete the college painting.
Collage Painting Skills 2 - Blending Paint and Fine Details
Homework : Continue working on the collage painting. You will be told in the lesson what to paint next (concentrating on the simple objects first and then increasingly more difficult items with blending and fine details).
Deadline : The deadline will always be your next Art lesson unless stated otherwise on MILK.
Lesson 5, 6 & 7
Classwork : Students continue working on the collage painting.
Homework: Continue working on the collage painting.
Deadline : Because Milk is no longer in use and the Year 8 report are about to be written the following deadline apply.
Students need to submit all work for marking by the following dates.
Photographers need to email the final ‘Powerful Portraits’ PowerPoint and also hand in sketchbooks.
Fine Artist need to hand in sketchbook with the Collage and Painting stuck in.
Improvements to any previous work that student wish to be re-marked. Remarking needs to clearing requested in emails or sketchbooks.
8D submission deadline - Friday 11th March, 2021
8E submission deadline - Monday 7th March, 2021
8A submission deadline - Monday 7th March, 2021
8B submission deadline - Friday 11th March, 2021
8C submission deadline - Friday 4th March, 2021
(The deadline for each class is 2 or 3 days after Lesson 7 so that Year 8 reports can be written on time)
Lesson 8
Classwork : Students initially watch the two introductory videos to perspective shown below. Students need to gain an understanding of terms like one point perspective, two point perspective, vanishing point, true horizon, eye level and foreshortening.
Introduction to One Point Perspective
Understanding Linear Perspective
After this students watch the ‘Perspective Heading 1’ video below and then use ‘one point perspective’ to draw a PERSPECTIVE heading in their sketchbook (they do not add colour at this stage).
Perspective Heading 1
Homework : Complete the PERSPECTIVE heading (but do not add colour).
Deadline : The deadline will always be your next Art lesson unless stated otherwise on MILK.
Lesson 9
Classwork : Students should watch the ‘Perspective heading 2’ video below and now aim to transform their ‘one point perspective’ PERSPECTIVE heading into a ‘two-point perspective’ heading. After this students should aim to make the heading look truly three dimensional by adding colour to their work using different tones of colour pencil.
Perspective Heading 2
Homework: Complete the ‘two-point perspective’ heading making it look truly three dimensional by using different tones of colour pencil. Students may also wish to go around the heading with a fine liner.
Deadline : The deadline will always be your next Art lesson unless stated otherwise on MILK.
Lesson 10
Classwork : Students watch the ‘Perspective in the National Gallery’ video and complete the video questionnaire (this has been posted to students). Please note that the video is currently not shown on sacart due to copyright restrictions but a private link will be posted into Teams at the start of the lesson.
The video is 20 minutes long but can be paused or replayed to ensure students are able to answer all questions. The ‘Perspective Video Questionnaire’ sheet should finally be stuck neatly in sketchbooks (on the next page to the one where students completed the Perspective heading).

Homework: There is no homework this week.
Deadline : The deadline will always be your next Art lesson unless stated otherwise on MILK.
Lesson 11
Classwork : Students first watch the ‘Atmospheric Perspective Project Overview’ video below. They then collect 6 cloud picture and 6 tree pictures (without leaves) and present these neatly on two sketchbook pages. Students will also need to write about the clouds as described in the video.
Atmospheric Perspective Project Overview
Boys without access to a printer can do this work on two Powerpoint slides but they must still include the information shown in the ‘Atmospheric Perspective Project Overview’ video.
Below are two examples written work which should include describing the what is in the picture, the cloud type and also cloud characteristics. Use high quality descriptive language for each cloud picture.

Secure example (describes the cloud but not really the picture)

Excellence example (describes the cloud and picture in highly detailed descriptive language)
Homework : Students need to complete the cloud and tree research work and submit pictures of the work in sketchbooks or the 2 slide PowerPoint.
Deadline : The deadline will always be your next Art lesson unless stated otherwise on MILK.
Lesson 12
Classwork : Students watch the ‘Atmospheric Perspective Cloud Painting’ video below and then paint the first cloud practice painting. Remember to practice on scrap paper beforehand - most student don’t use enough water and too much black paint!
Atmospheric Perspective Cloud Painting
Homework: Complete the first cloud painting practice, stick in the sketchbook and write a written evaluation explaining the techniques you used, what went well and what can be improved in the section cloud practice painting that you will complete during lesson 6. See example below. Remember you only need to complete and write about one cloud practice painting this week.

Cloud practice work and evaluations sketchbook page
Deadline : The deadline will always be your next Art lesson unless stated otherwise on MILK.
Lesson 13
Classwork : Students should again watch the ‘Atmospheric Perspective Cloud Painting’ video from Lesson 5 and then paint the second cloud practice painting. Hopefully the second painting will show an improvement over the first. The two cloud practice paintings should be stuck in the sketchbook and students must write an evaluation of each painting explaining what techniques they used, went went well, and what improvements could to be made. See the good quality example below.
Homework: Complete the classwork.

Cloud practice work and evaluations sketchbook page
Deadline : The deadline will always be your next Art lesson unless stated otherwise on MILK.
Lesson 13
Classwork : Students watch the ‘Atmospheric Perspective Tree Demonstration’ video below and then paint the first tree practice painting. There are also some good examples of tree paintings shown below as well as a common mistakes sheet.
Atmospheric Perspective Tree Demonstration

Example tree Painting Practice and Tips
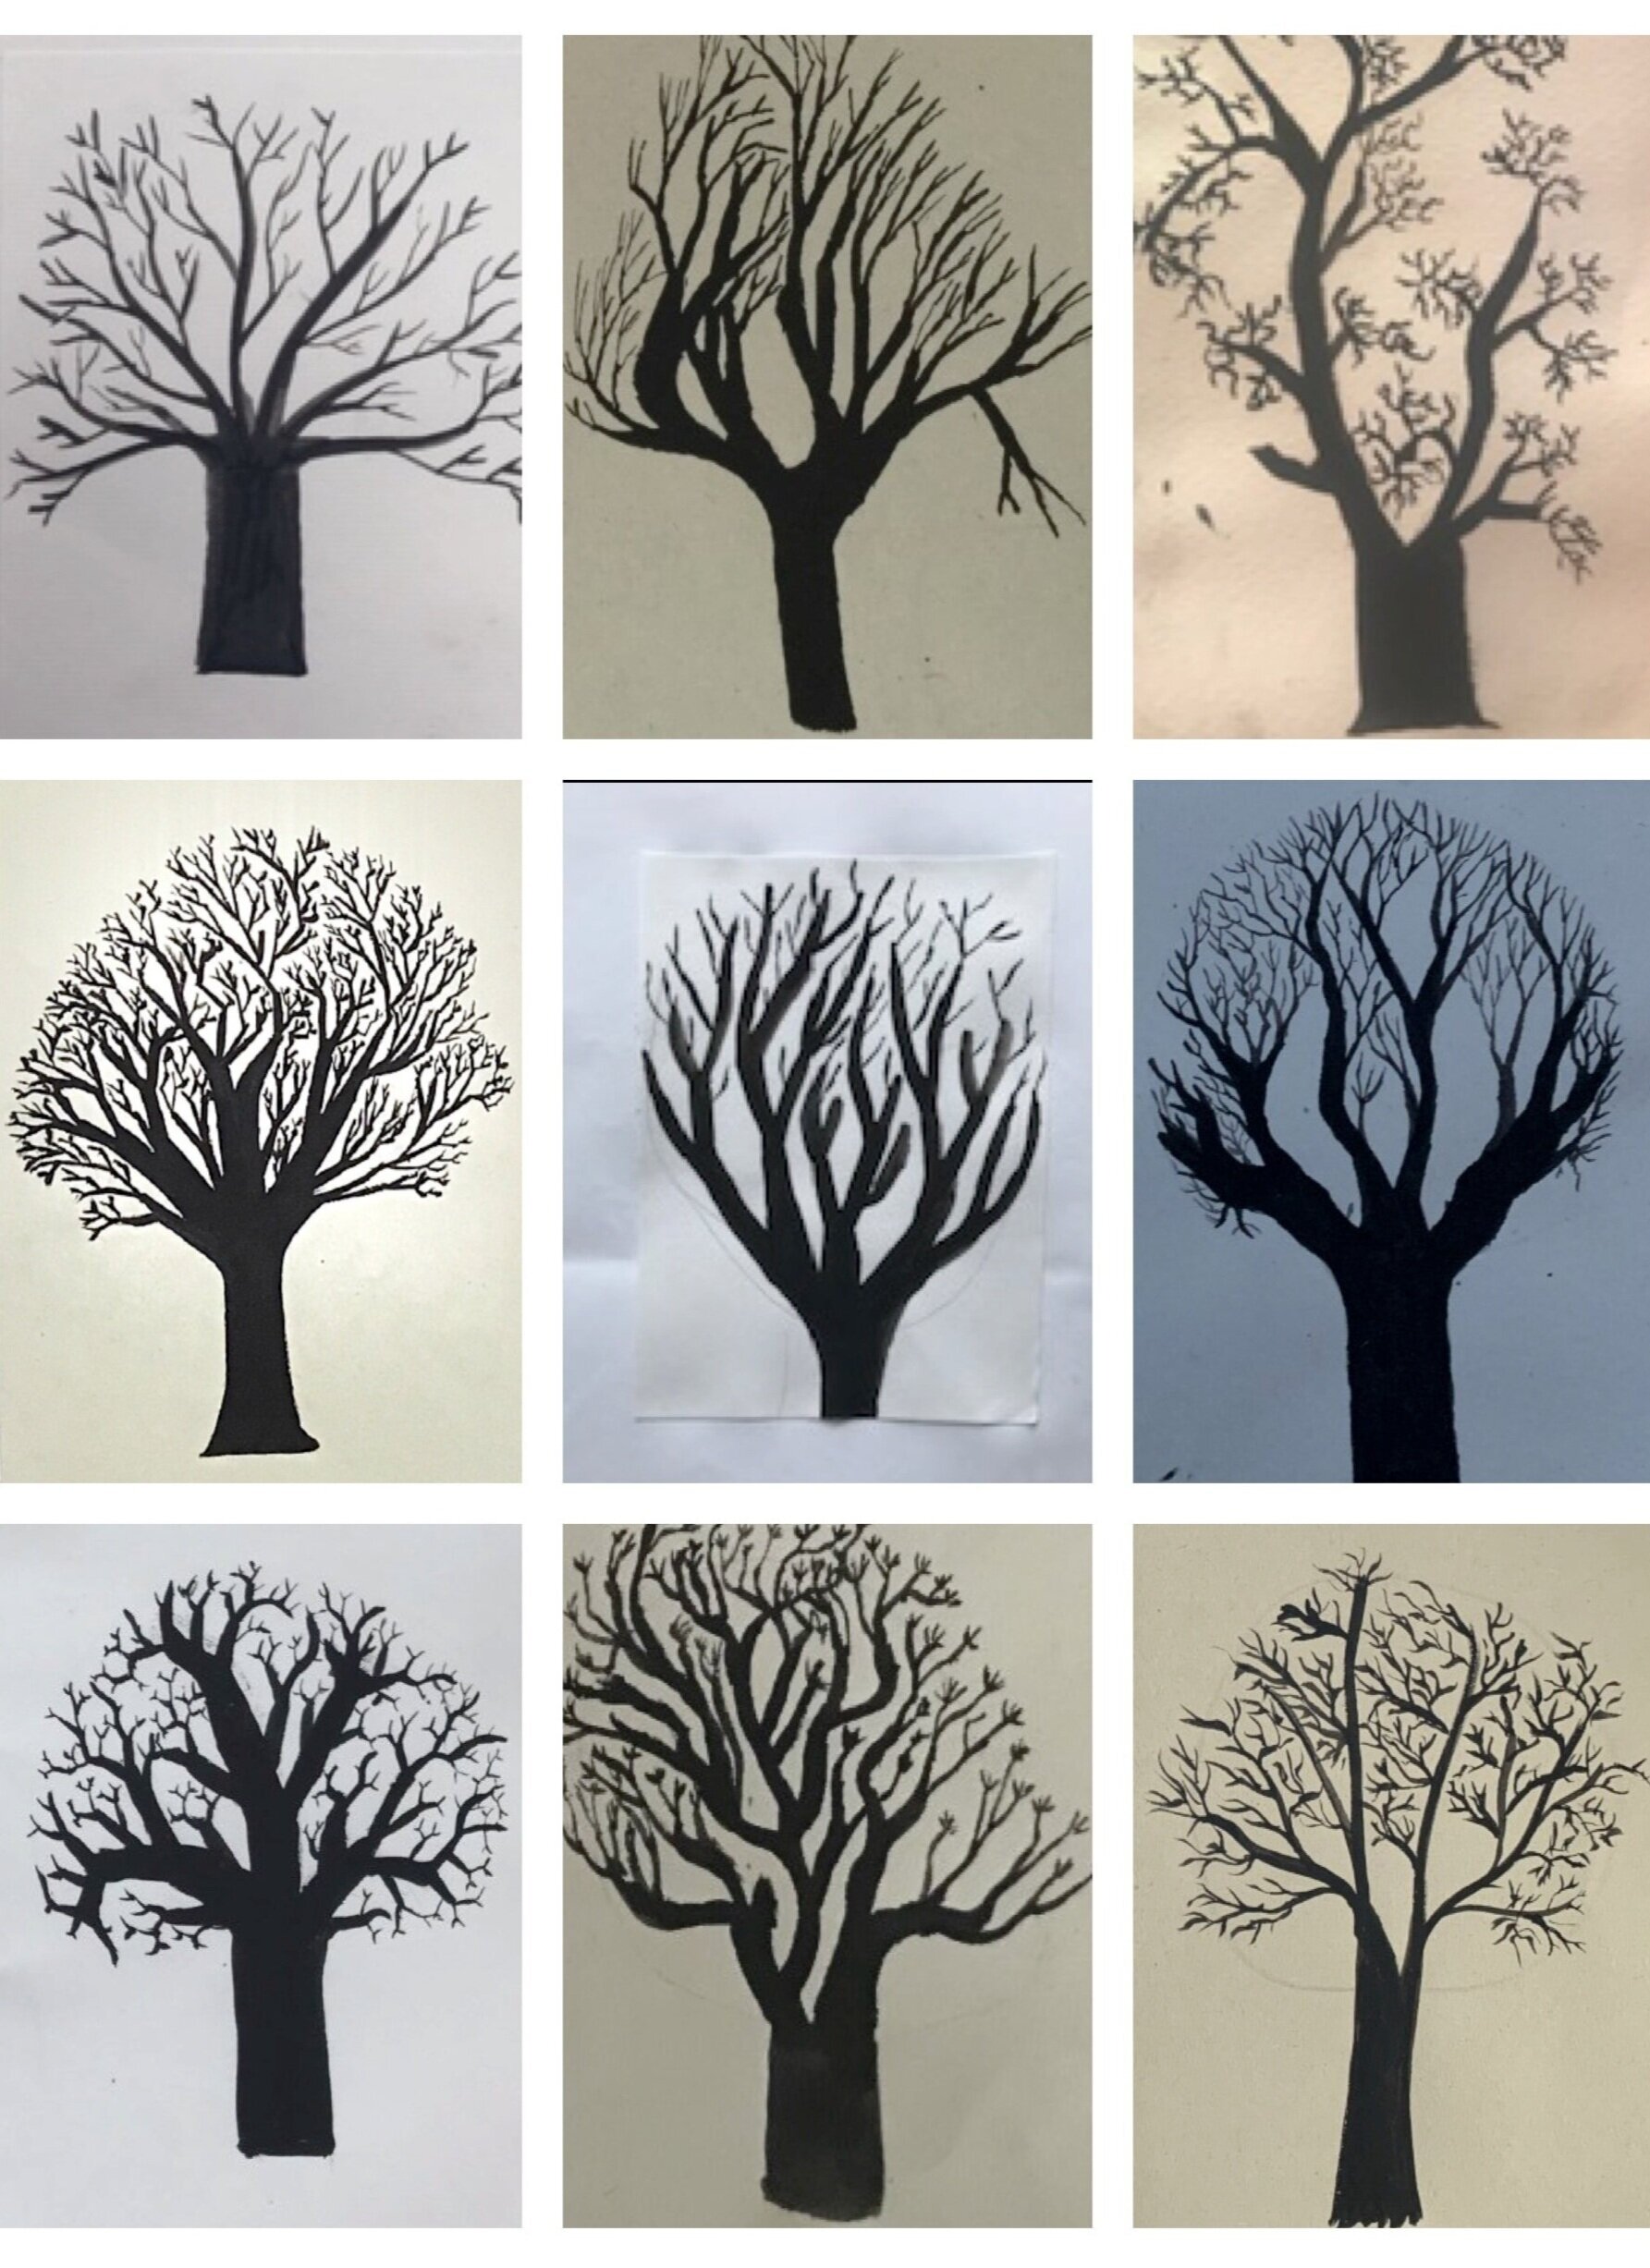
Good quality tree practice examples

Common mistakes sheet
Homework: Students again watch the ‘Atmospheric Perspective Tree Demonstration’ video and then paint the second tree practice painting. The two tree practice paintings should be stuck in the sketchbook and students must write an evaluation of each painting explaining what techniques they used, went went well, and what improvements could to be made. See a good quality sketchbook example below.

Tree practice work and evaluations sketchbook page
Deadline : The deadline will always be your next Art lesson unless stated otherwise on MILK.
Lesson 14
Classwork : Students then watch the ‘Final Clouds Atmospheric Perspective Landscape Painting’ video below and draw out the four mountain onto watercolour paper.
After this student need to paint the clouds. Don’t forget to practice the clouds one last time as you only get one chance to get it right on the watercolour paper.
Final Clouds Atmospheric Perspective Landscape Painting
Homework: Complete the classwork.
Deadline : The deadline will always be your next Art lesson unless stated otherwise on MILK.