Year 9 - Gargoyle Unit
( if you miss the lesson for any reason you should still complete both classwork and homework)
UNIT ARTISTS:
UNIT VOCABULARY: Gargoyle, Grotesque, Chimera, Architectural Feature, Stone Mason, Research Art Criticism, Fact, Personal Opinion, Descriptive Details
Drawing, Mark-making, Line, Shape, Form, Tone, Shading, Cross-hatching, Blending, Shading, Pattern, Ellipse, Texture, Outline, Graded Pencils, Mechanical Pencil, Eraser, Stump
Clay, Sculpture, Modelling, Proportions, Slip, Kiln, Firing, Glaze, Ceramics
Lesson 1
Classwork : Students are initially issued with a new sketchbook. They then watch the ‘Gargoyle Project Overview’ video below. This year the final Gargoyle Painting is not part of this unit.
Starting a New Sketchbook video
A Simple Introduction to Cubism
Students then start the ‘Gargoyles’ heading over a double sketchbook page. Students will use similar skills to the ‘Word as Meaning’ work in Year 8. The ‘Gargoyles’ heading will also need to look like stone. See examples below.
Example Work (Secure- to Excellence+)
Excellence+ Extremely high level of detail and imagination shown, but the last 2 letters look squashed so no Excellence++
Excellence High level and imagination, a little more stone-like texture needed to achieve an Excellent+
Secure+ Good level of detail and imagination, and very good subtle use of colour
Secure- General good detail and lettering but the lettering lacks any attempt to create a stone effect
Homework: Complete the ‘Gargoyles’ heading over a double sketchbook page.
Lesson 2
Classwork : Firstly, students watch the ‘The Art of Gargoyles’ and then ‘The historical origins of Gargoyles’ introductory videos. They should take notes in the back of sketchbooks in readiness to start the research section 1 which is on General information about Gargoyles. This section should include,
A Definition of the word ‘Gargoyle’
The History of Gargoyles
The Meaning and Purpose of Gargoyles
Examples of Famous Gargoyles
Afterwards students also watch the ‘Gargoyles Research Work’ video.
The historical origin of Gargoyles
The Art of Gargoyles
Gargoyle Research Work
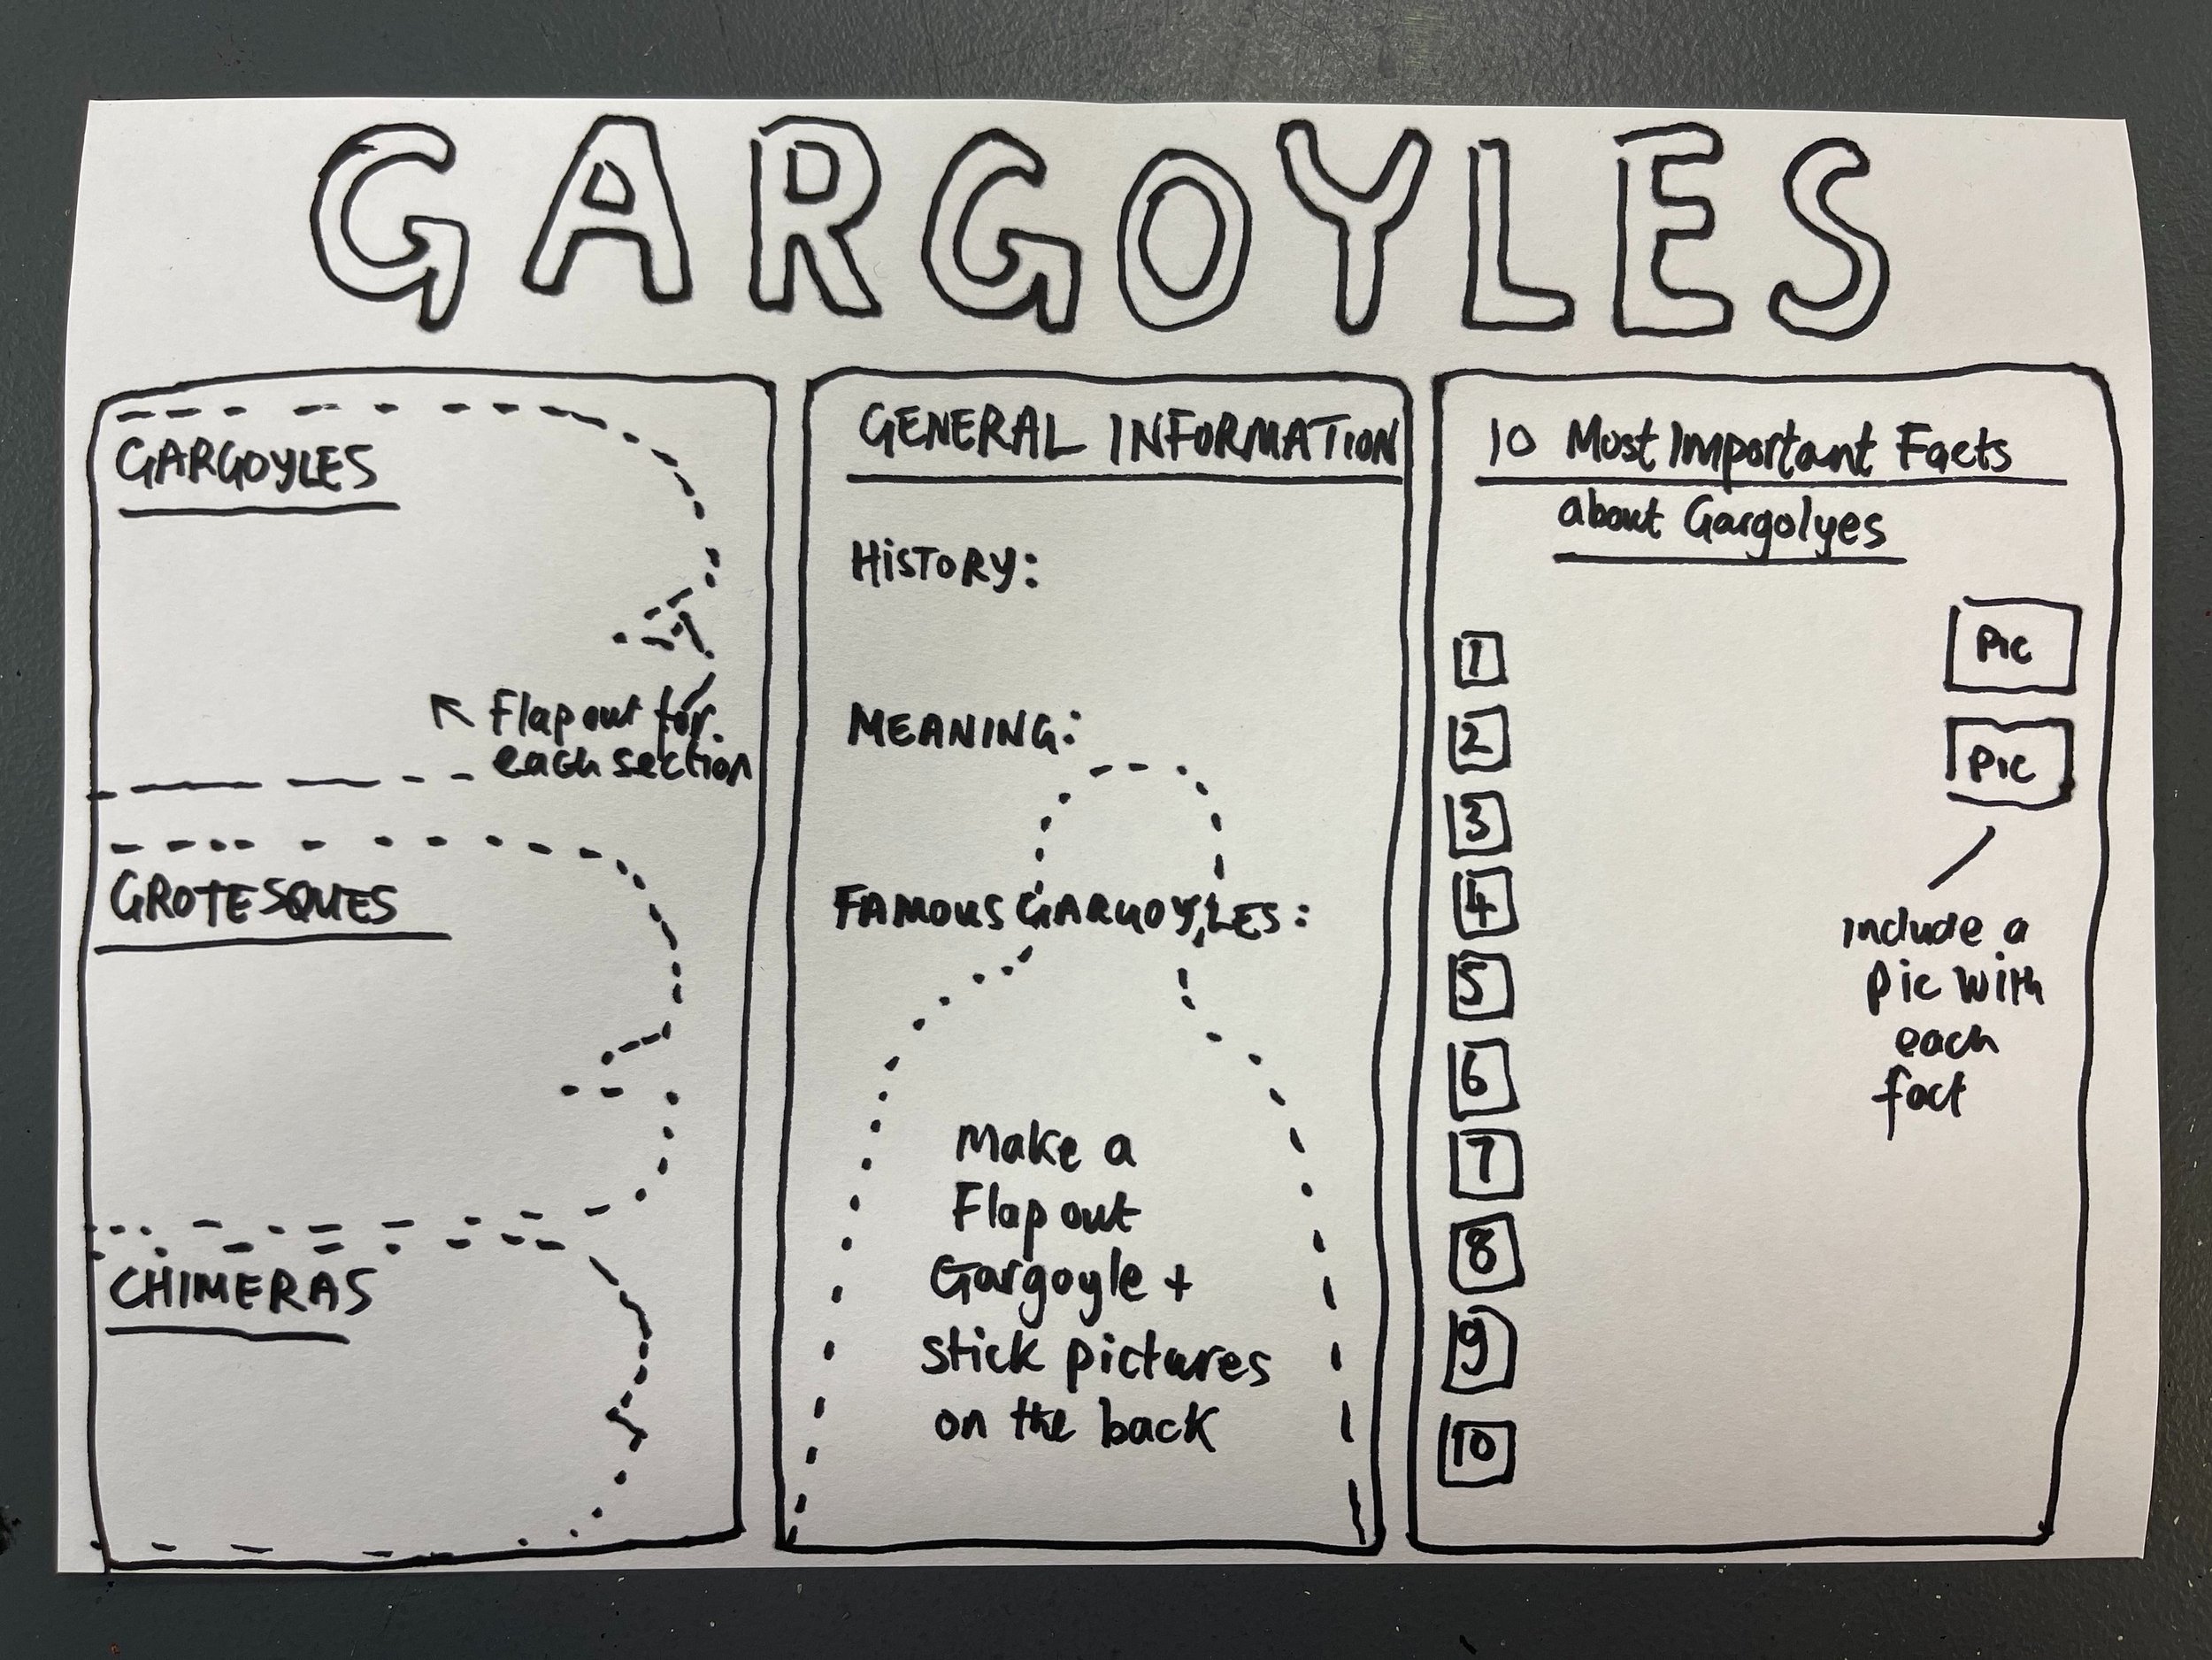
Students then start the gargoyle research over a double sketchbook page, beneath the ‘Gargoyles’ heading. The research must be presented in 3 sections. The work will be completed over the next 3 lessons. The sections are,
General information about Gargoyles
The differences between Gargoyles, Grotesques and Chimeras
The 10 most important facts about Gargoyles
The research will be assessed using the following criteria,
Quality and depth of written research
Quality of presentation (including the ‘Gargoyles’ heading)
Number of pictures presented (and if students use their own pictures)
Additional layout techniques such as flap-outs
Homework: Students complete section 1, General information about Gargoyles (written work and pictures). Think about the sub-headings we discussed in class such as History, Definition, Meanings, Uses, and Famous Gargoyles.
There is also ‘Gargoyles: Guardians of the Gates’ extra video student might wish to watch. This includes more in-depth information on gargoyles.
Gargoyles: Guardians of the Gates
Boys without access to a printer can email me one page of colour prints using the A4 Powerpoint Printing Template below. The pictures need to fit into the spaces left in sketchbooks, so please ensure pictures are measured accurately using the the rulers on the template.
Lesson 3
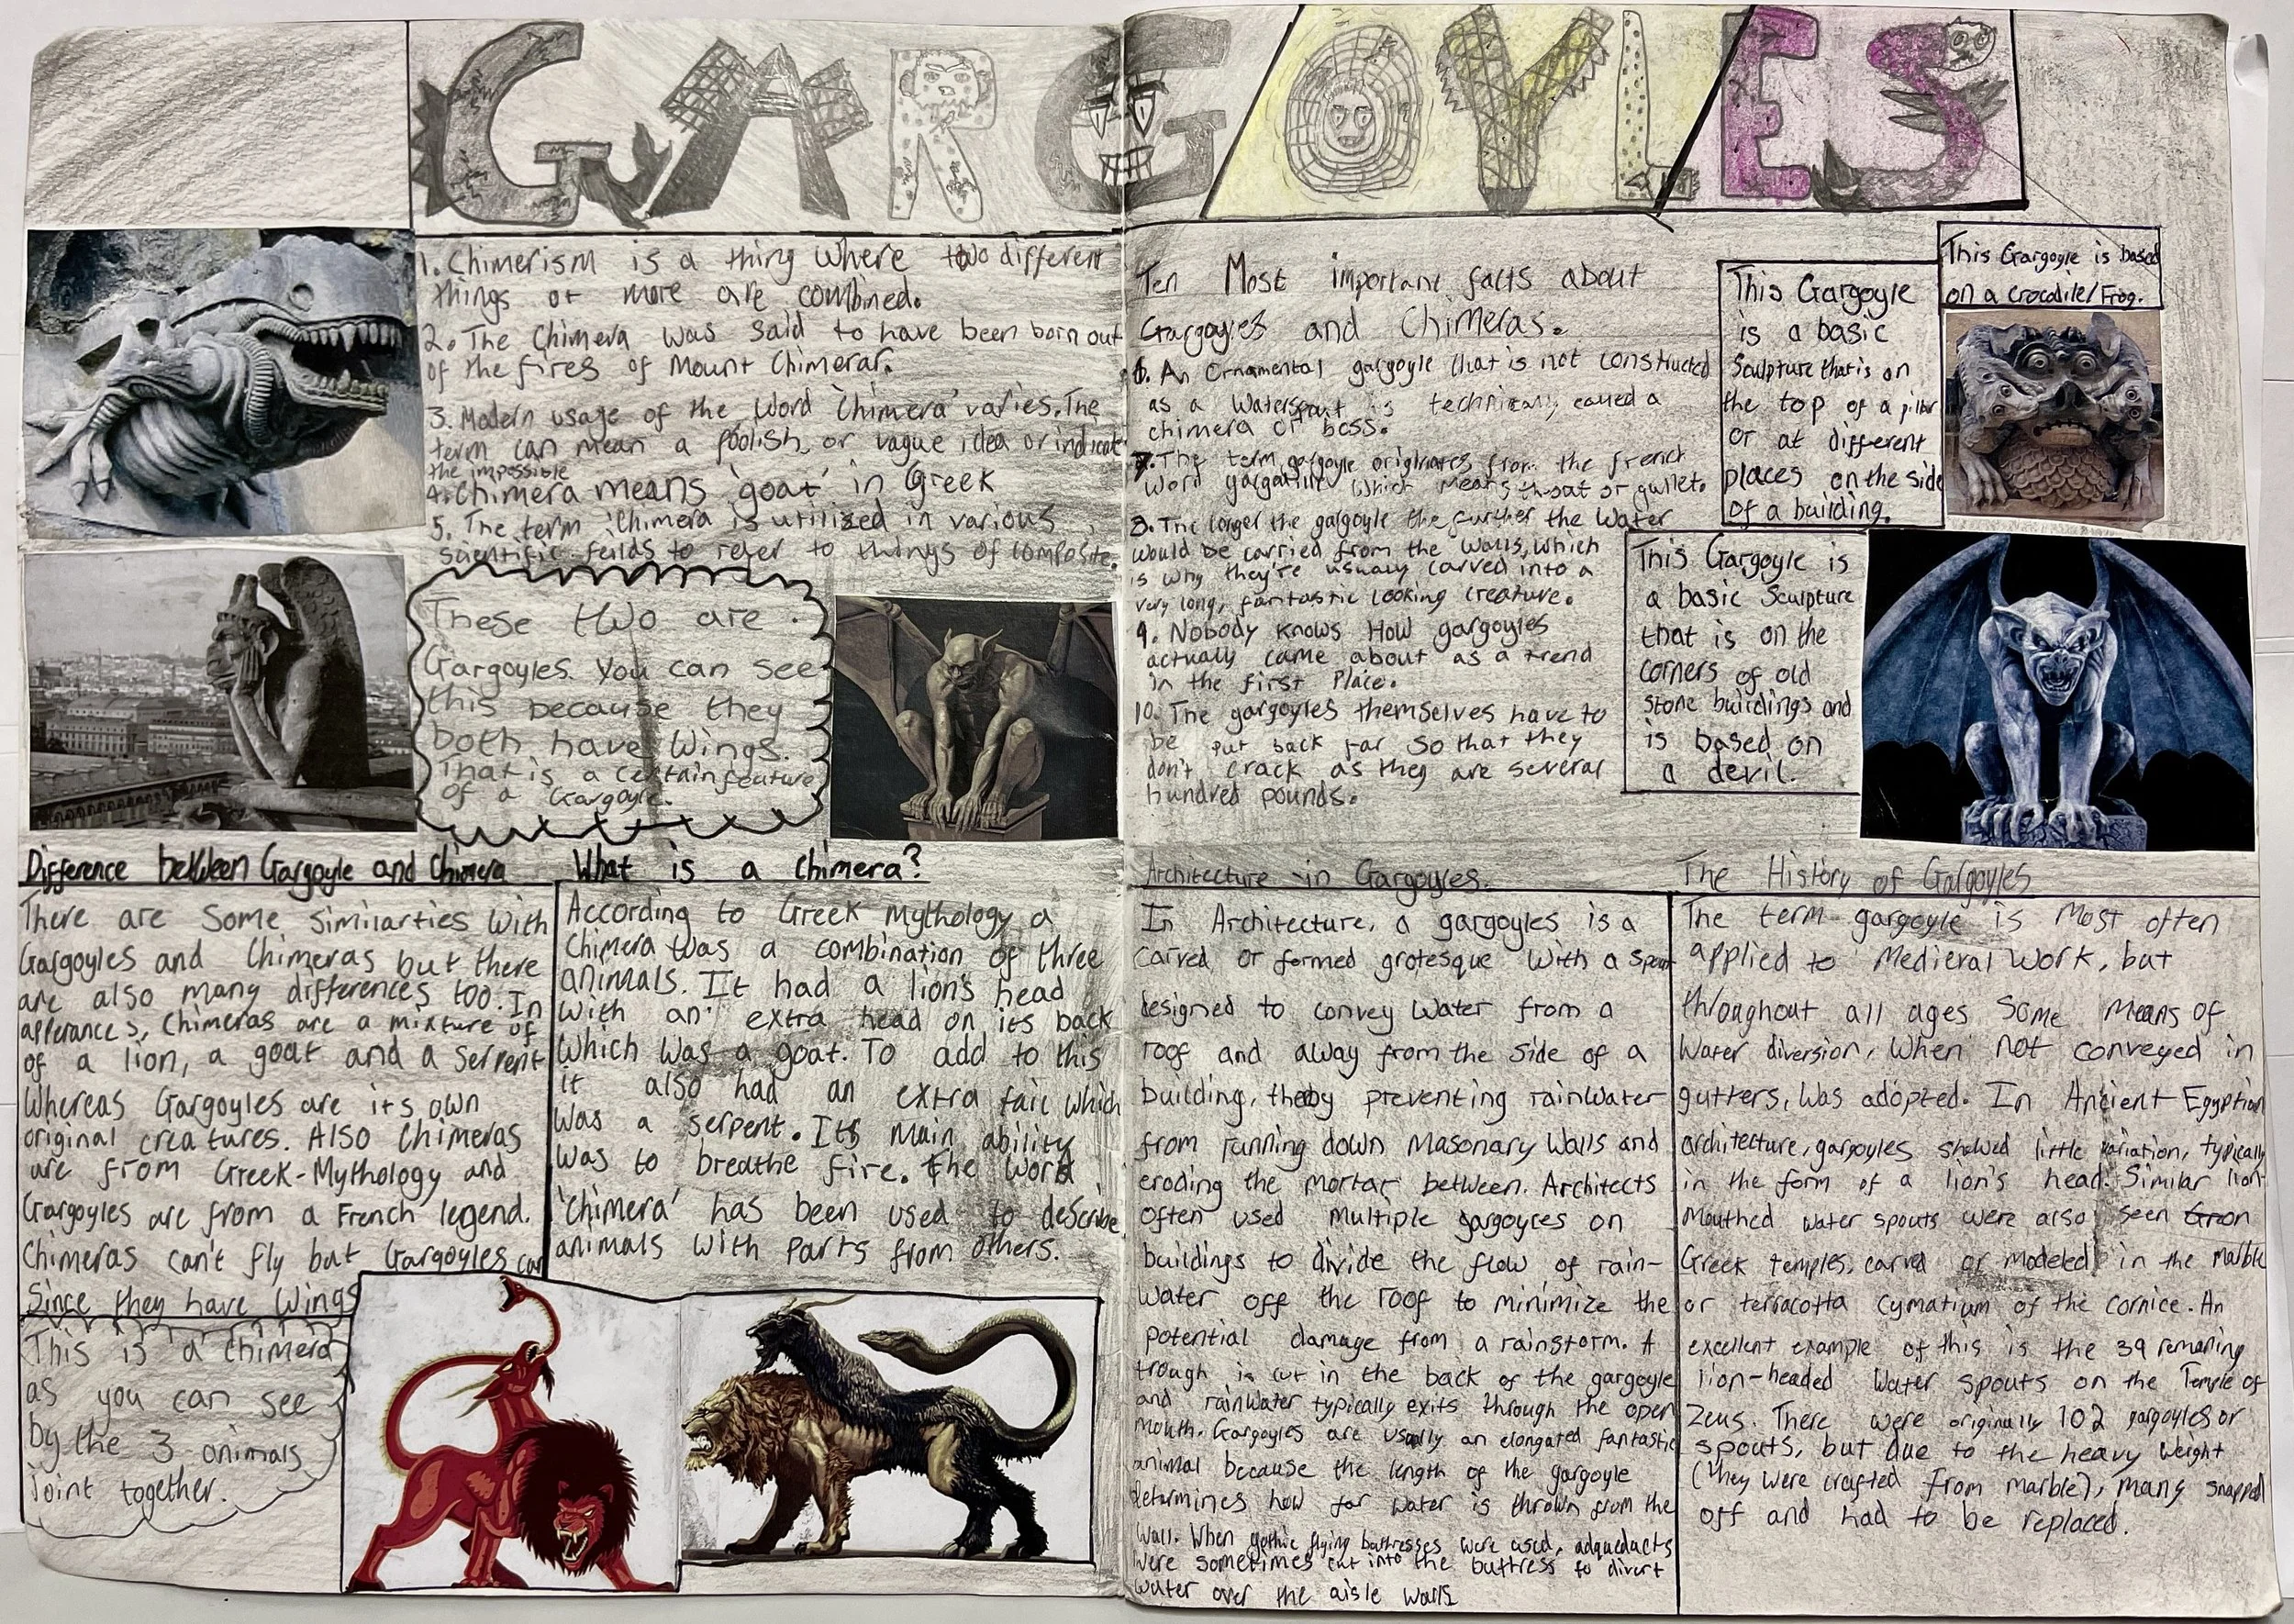
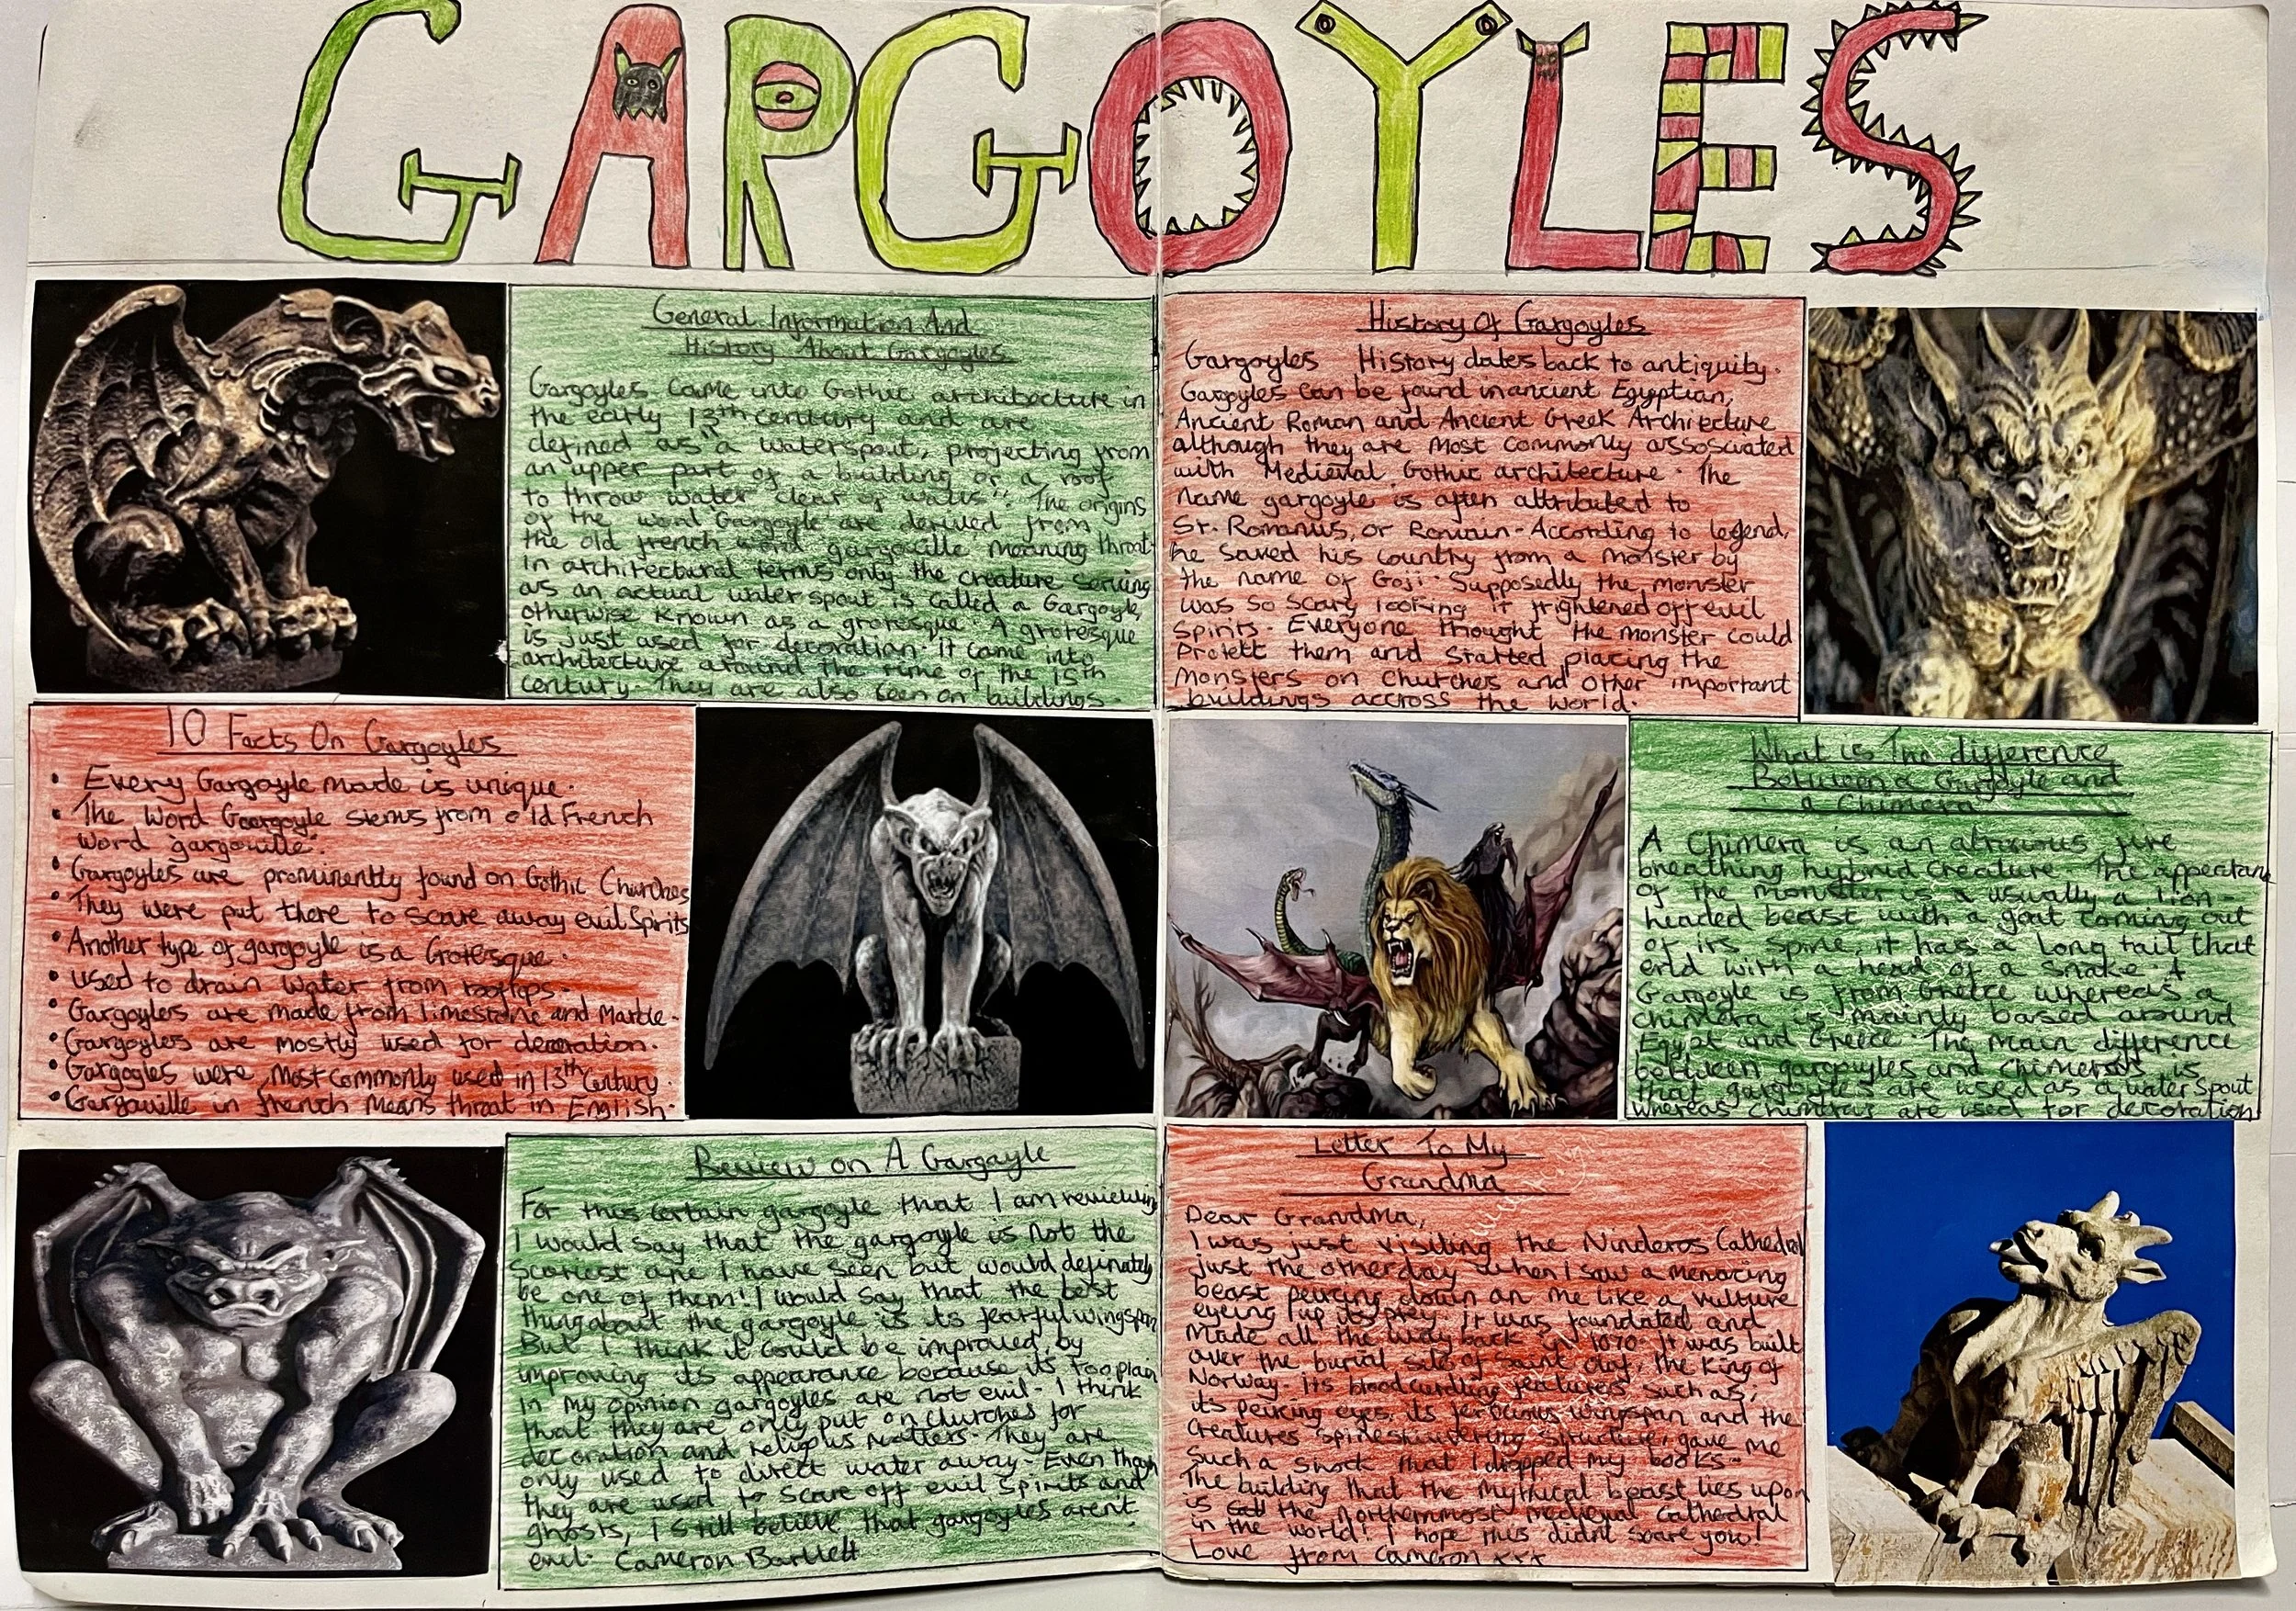
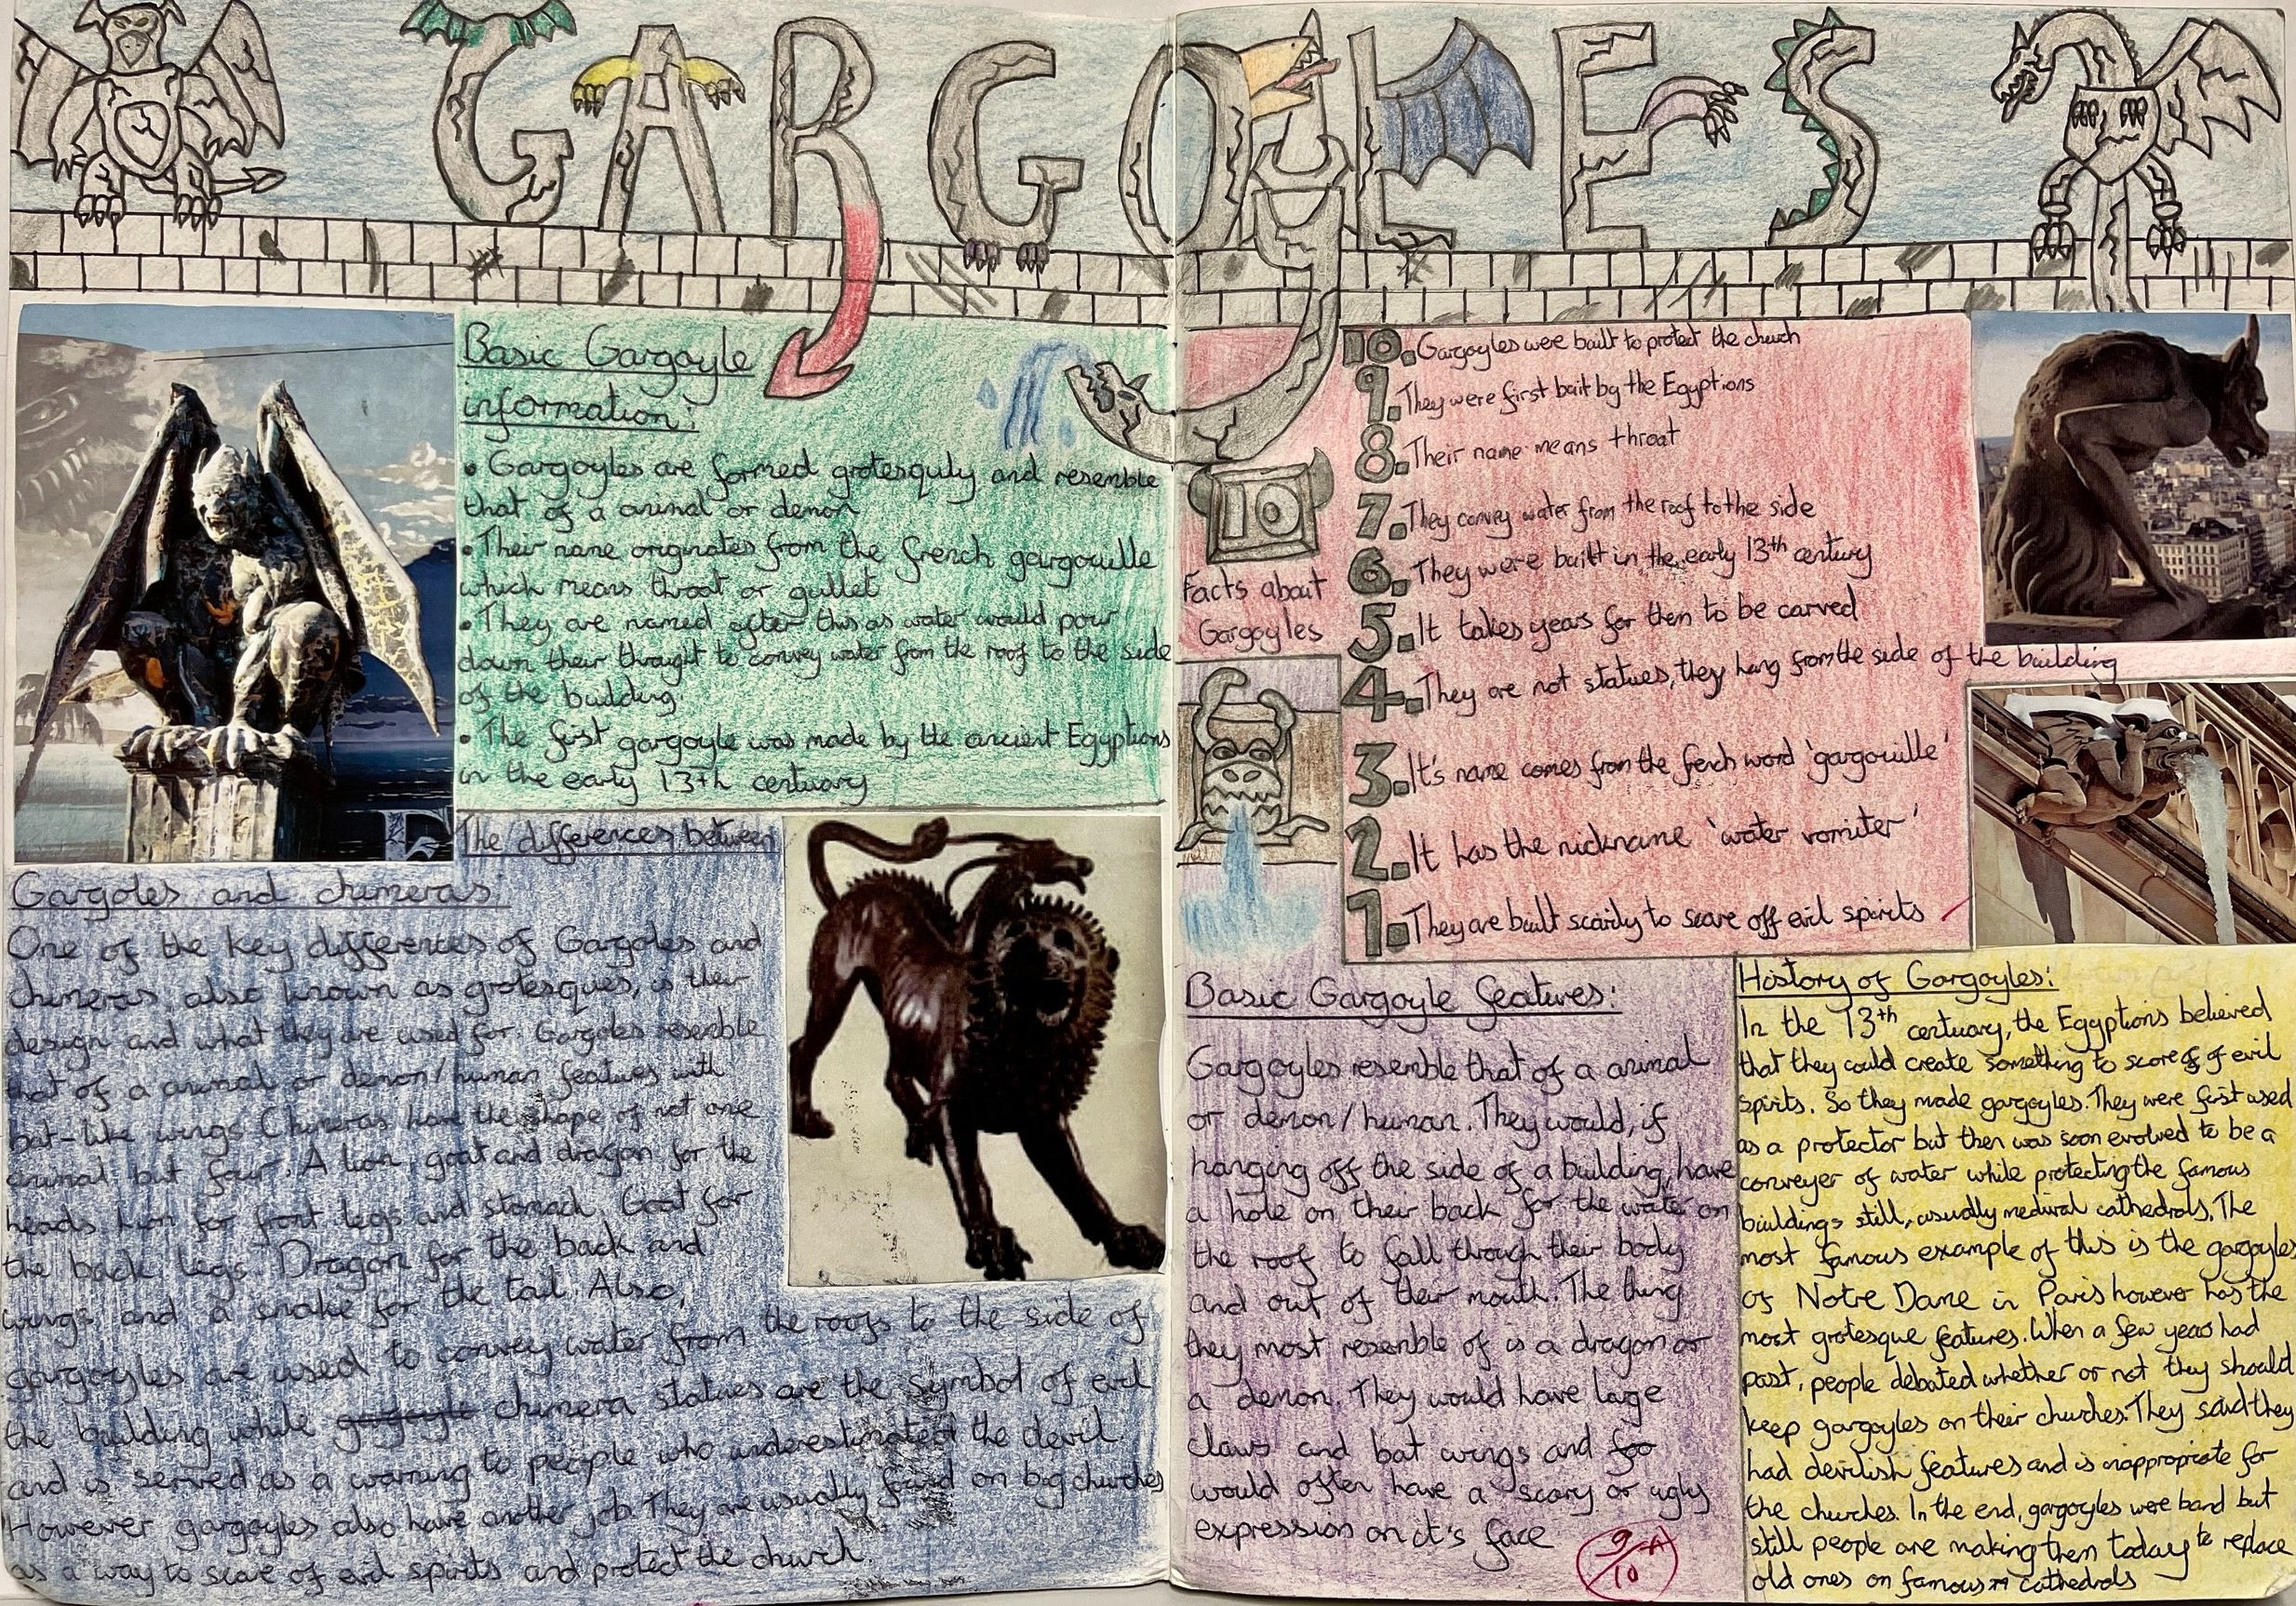
Classwork : Students make improvements to section 1, General information about Gargoyles. Some students might start Section 2, The differences between Gargoyles, Grotesques and Chimeras. example work below.
Example Work (Secure+ to Excellence+)
Secure+ great written detail but let down a little by the layout and use of colour
Secure+ Secure- heading but very good presentation improves the mark overall
Secure+ great written detail and presentation but let down by the use of only 4 pictures
Excellence great layout and presentation with additional detail and pictures
Homework: Students complete section 2, The differences between Gargoyles, Grotesques and Chimeras (written work and pictures).
Gargoyle Research - High Quality Examples
Lesson 4
Classwork : Students make improvements to Section 2, The differences between Gargoyles, Grotesques and Chimeras. Some students might start Section 3, The 10 most important facts about Gargoyles.
Homework: Students complete section Section 3, The 10 most important facts about Gargoyles (written work and pictures).
Lesson 5
Classwork : Students make improvements to Section 3, The 10 most important facts about Gargoyles. This is also a general improvement lesson so that students have an opportunity to progress the Gargoyle Research work to the next level. Some students may choose to start to design their own gargoyle for painting and sculpture.
Homework: There is no homework this week.
Lesson 6
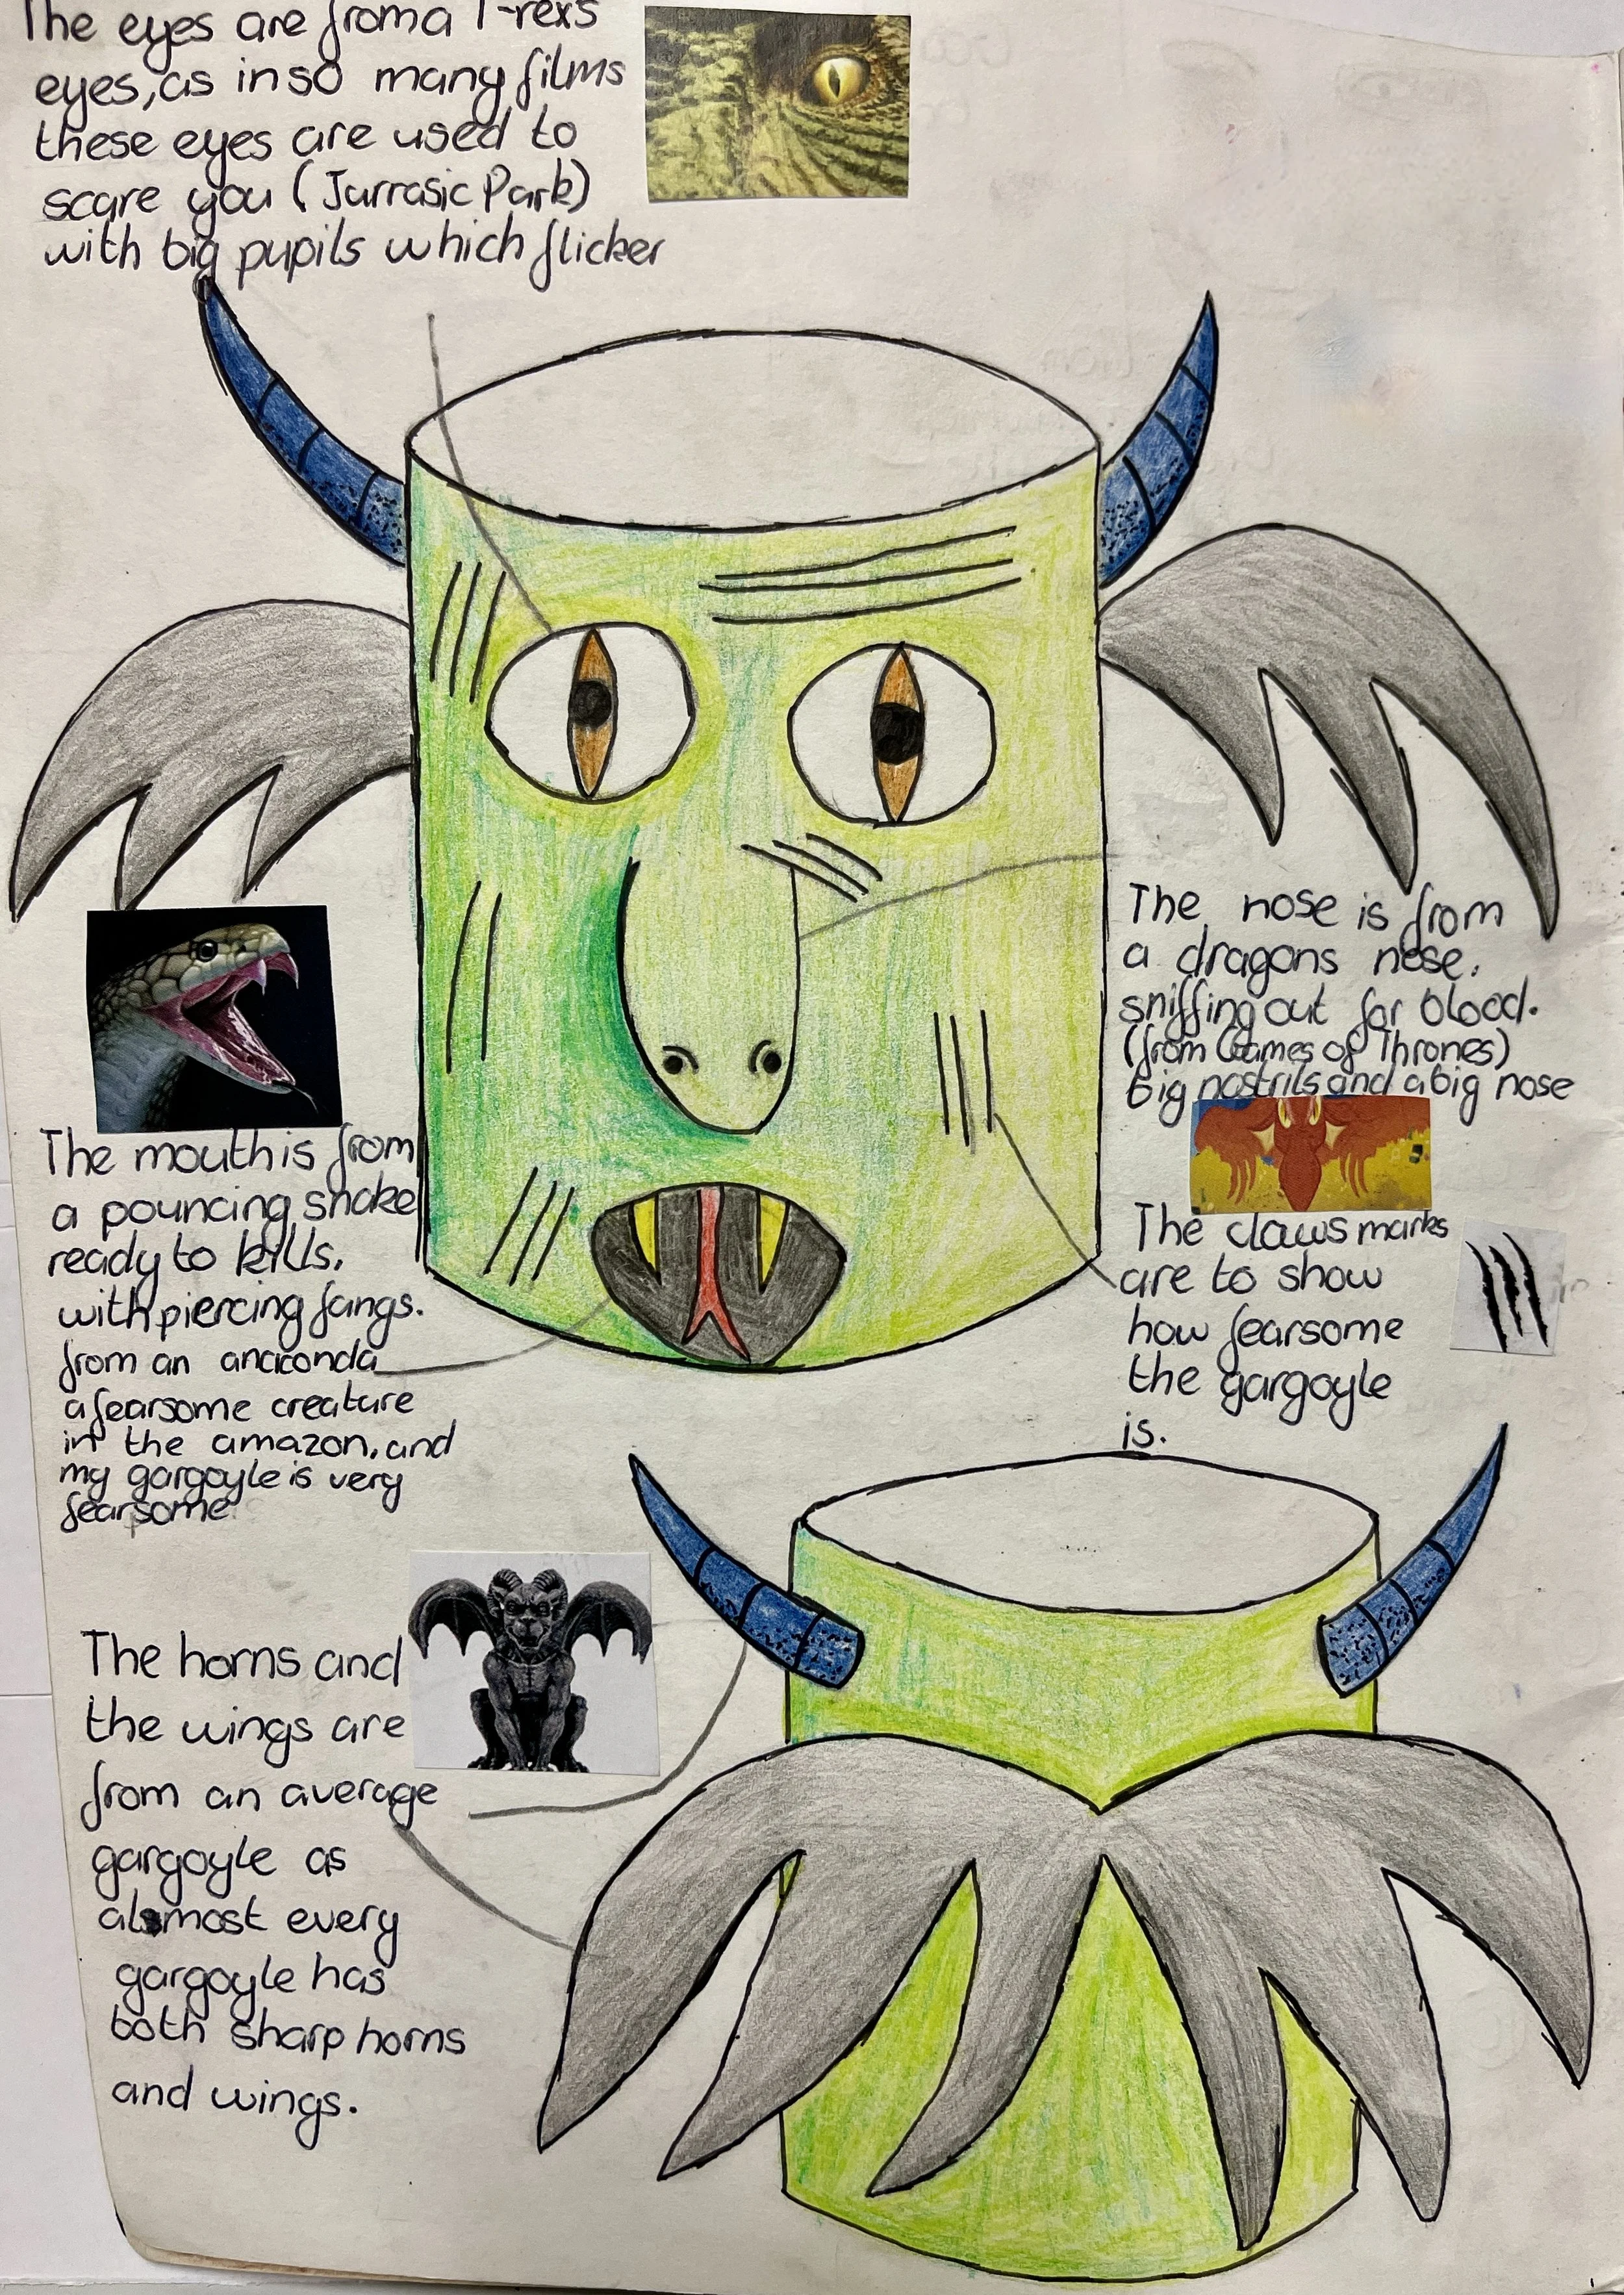
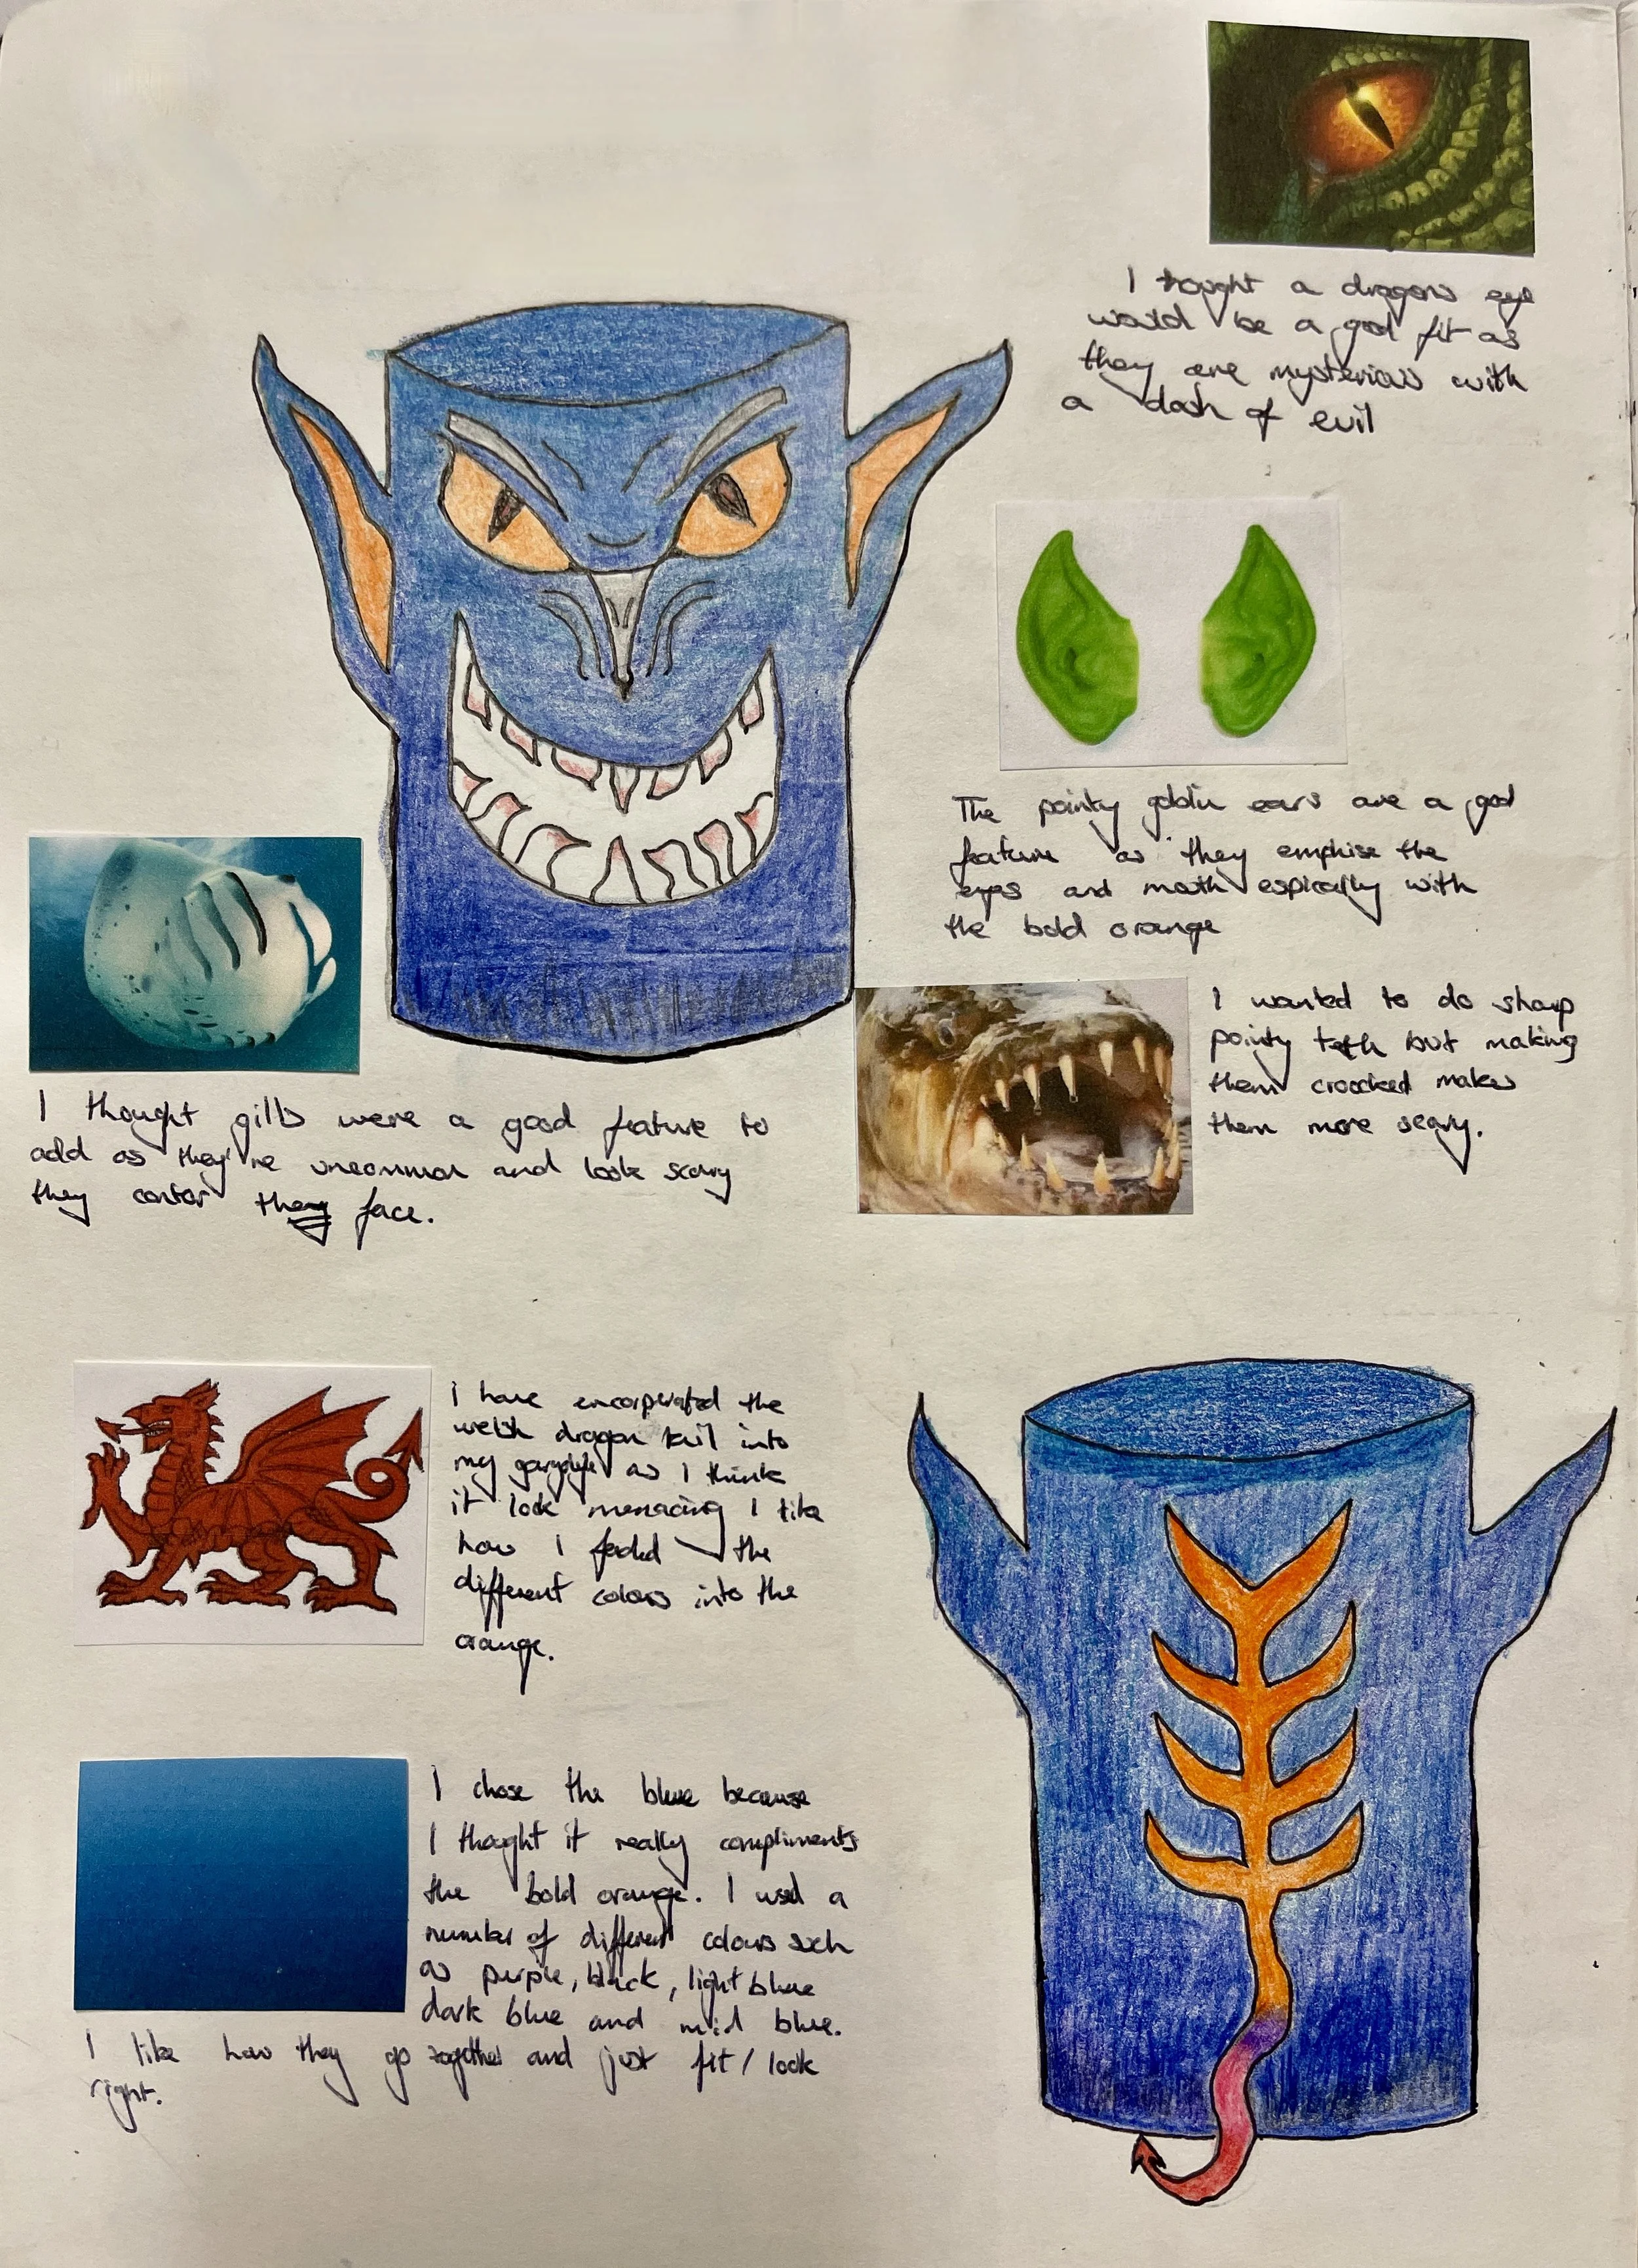
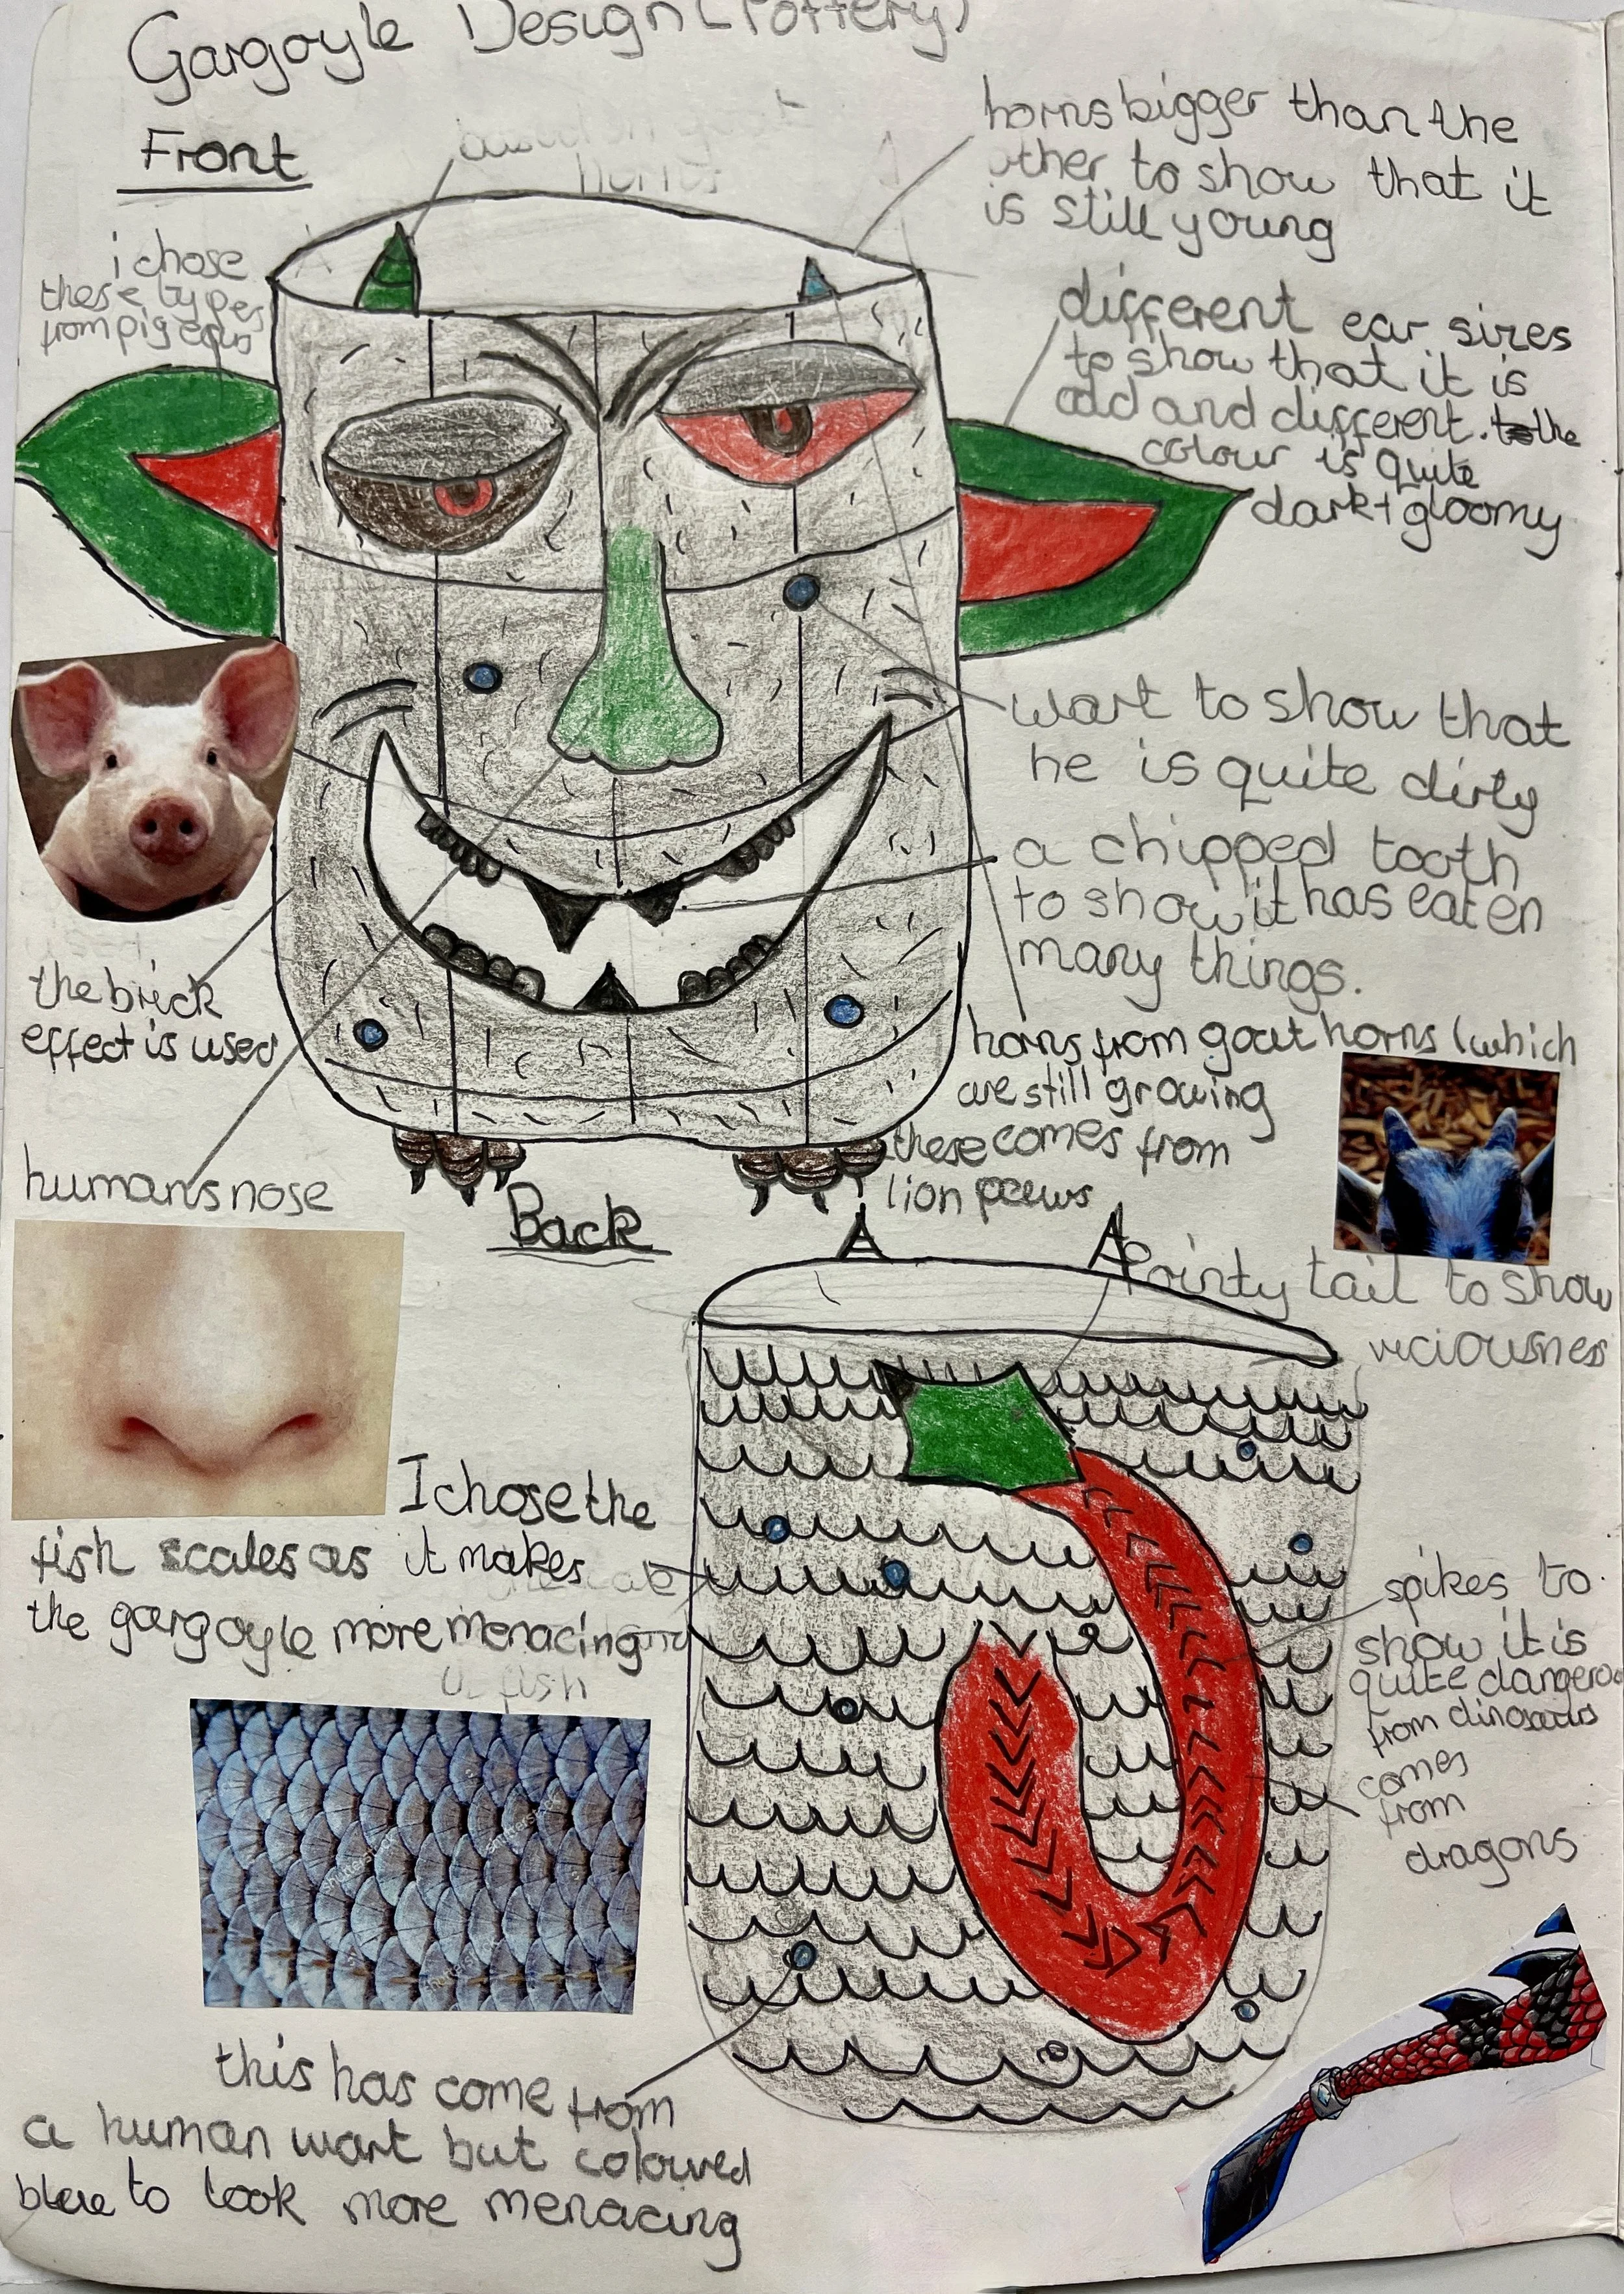
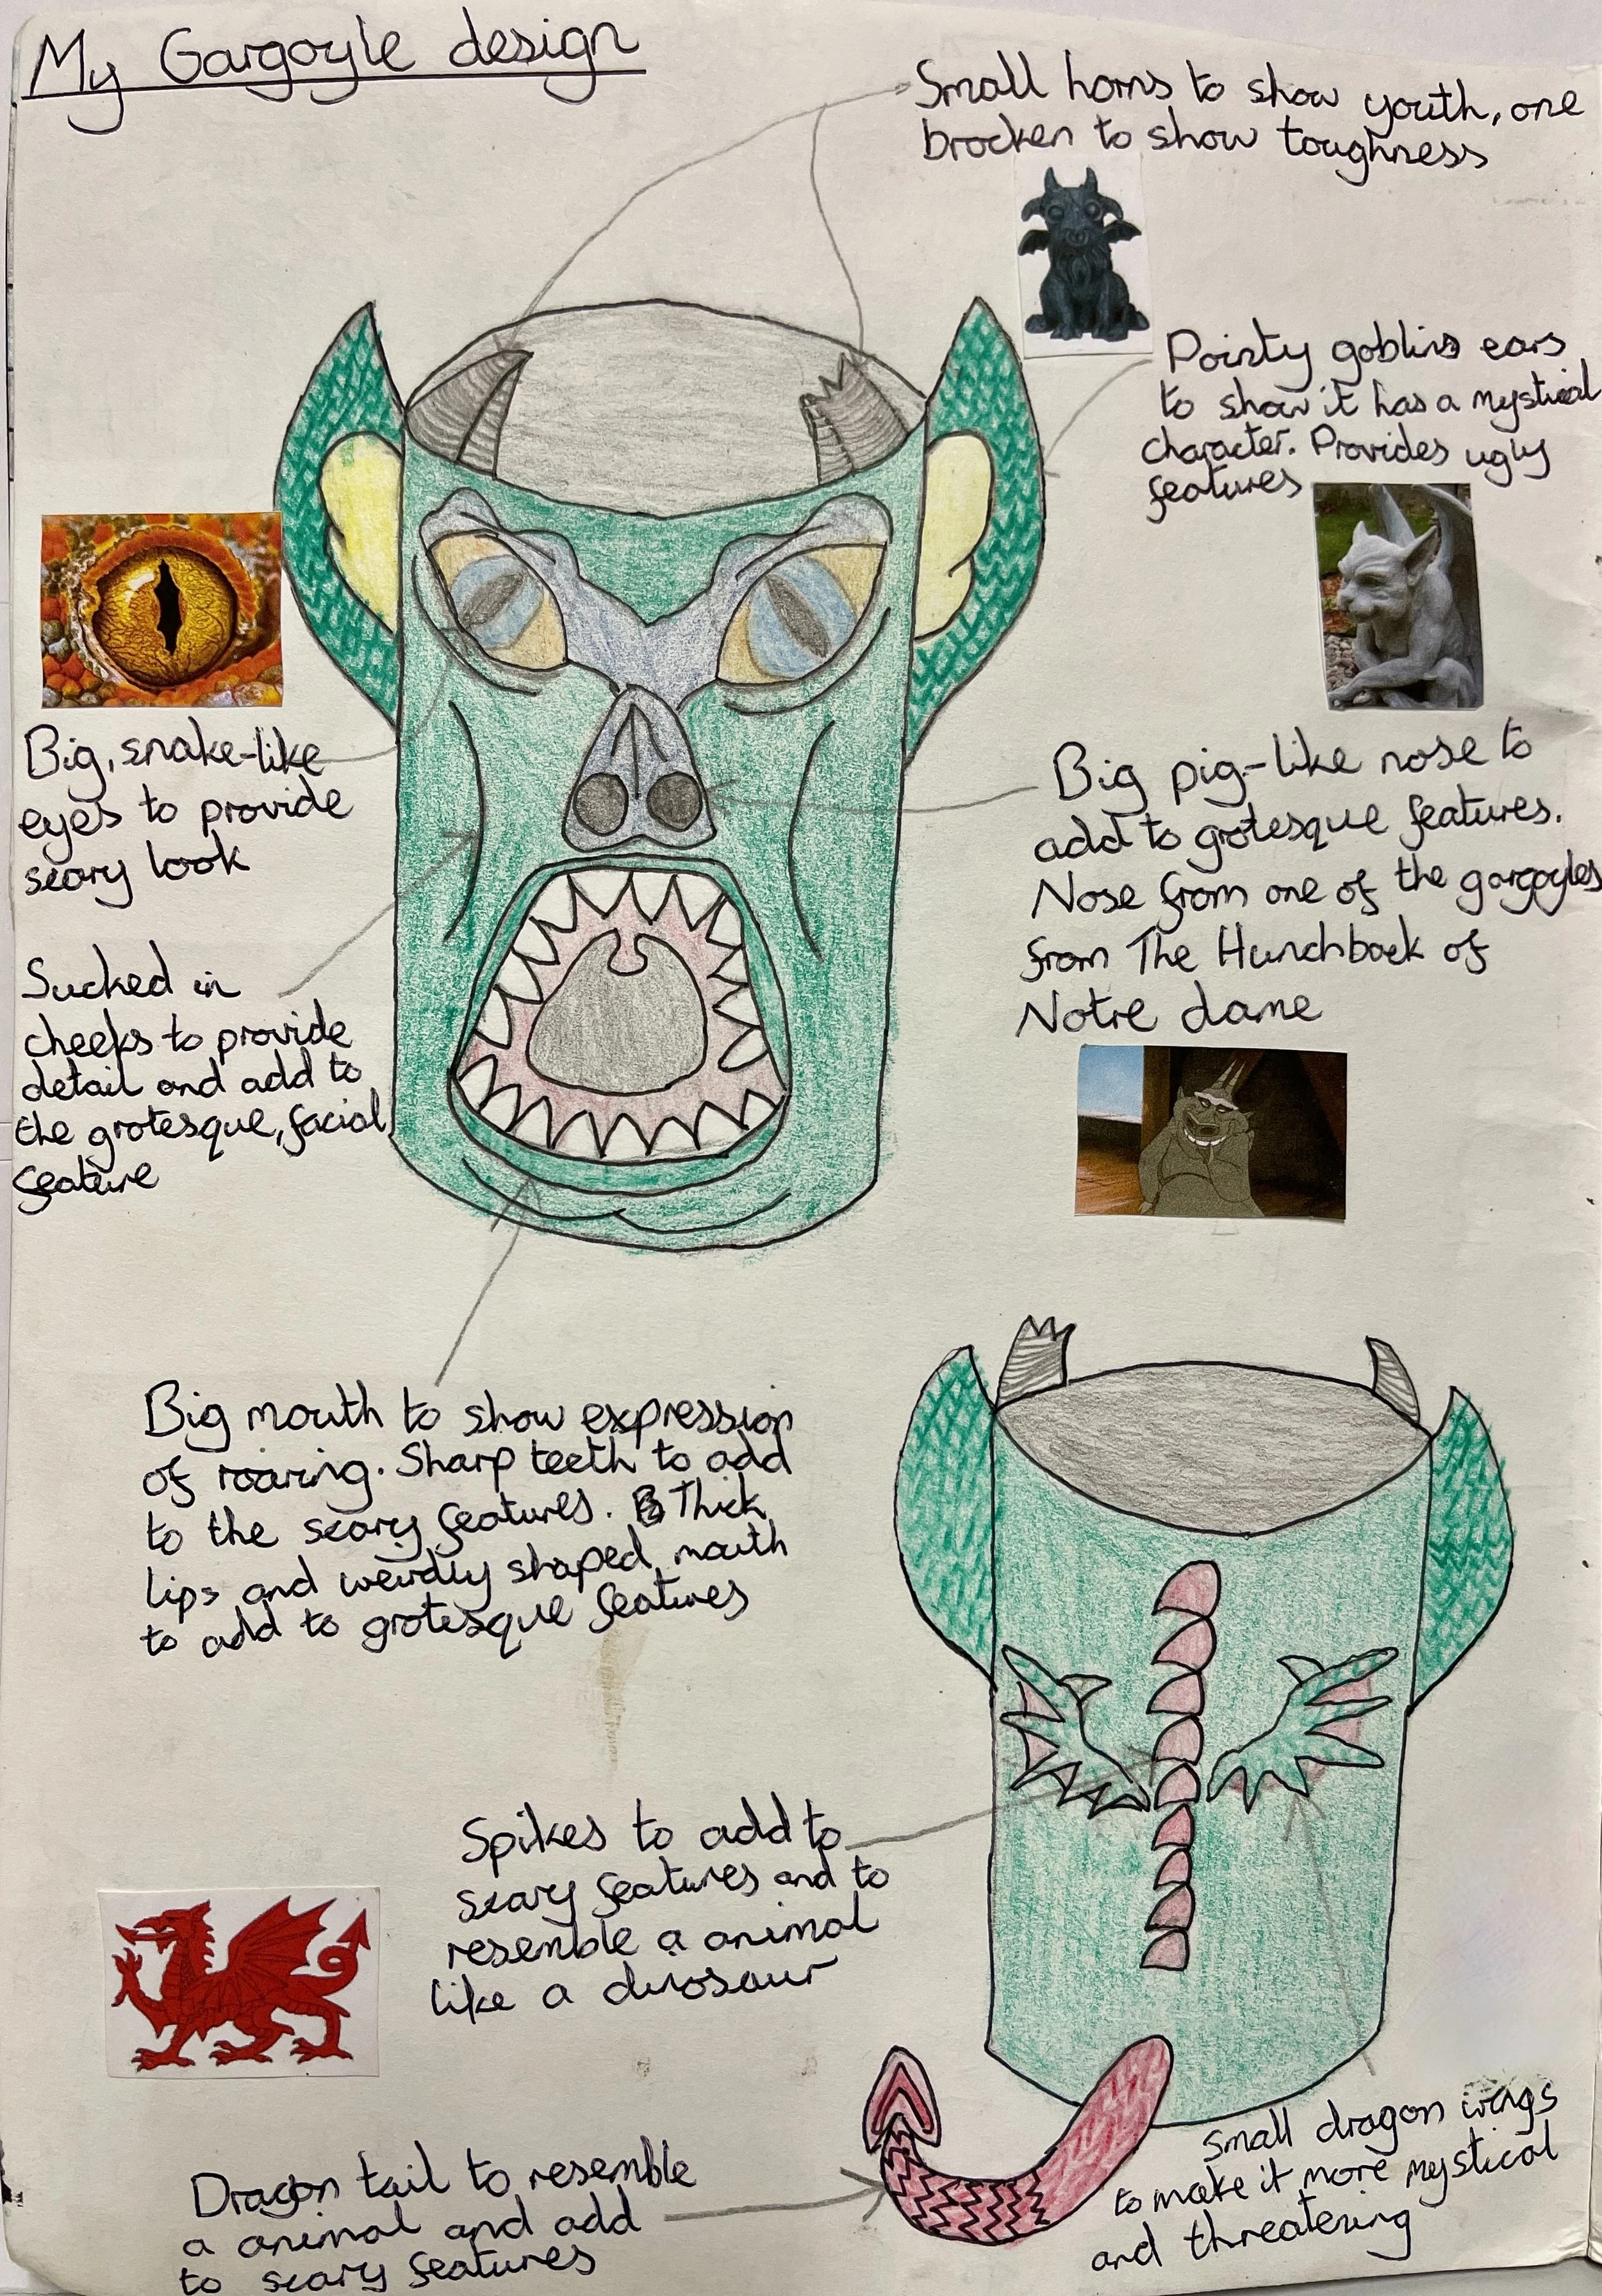
Classwork : Students start to design a gargoyle for sculpture design (back and front views). The sculpture will be modelled around a cylinder and students can use similar skills to draw the initial cylinder shape to those used in Year 7 for the tin can.
When designing the gargoyle sculpture it is important that students take inspiration not only from the gargoyles they have studied, by also from other animals (both real and mythical).
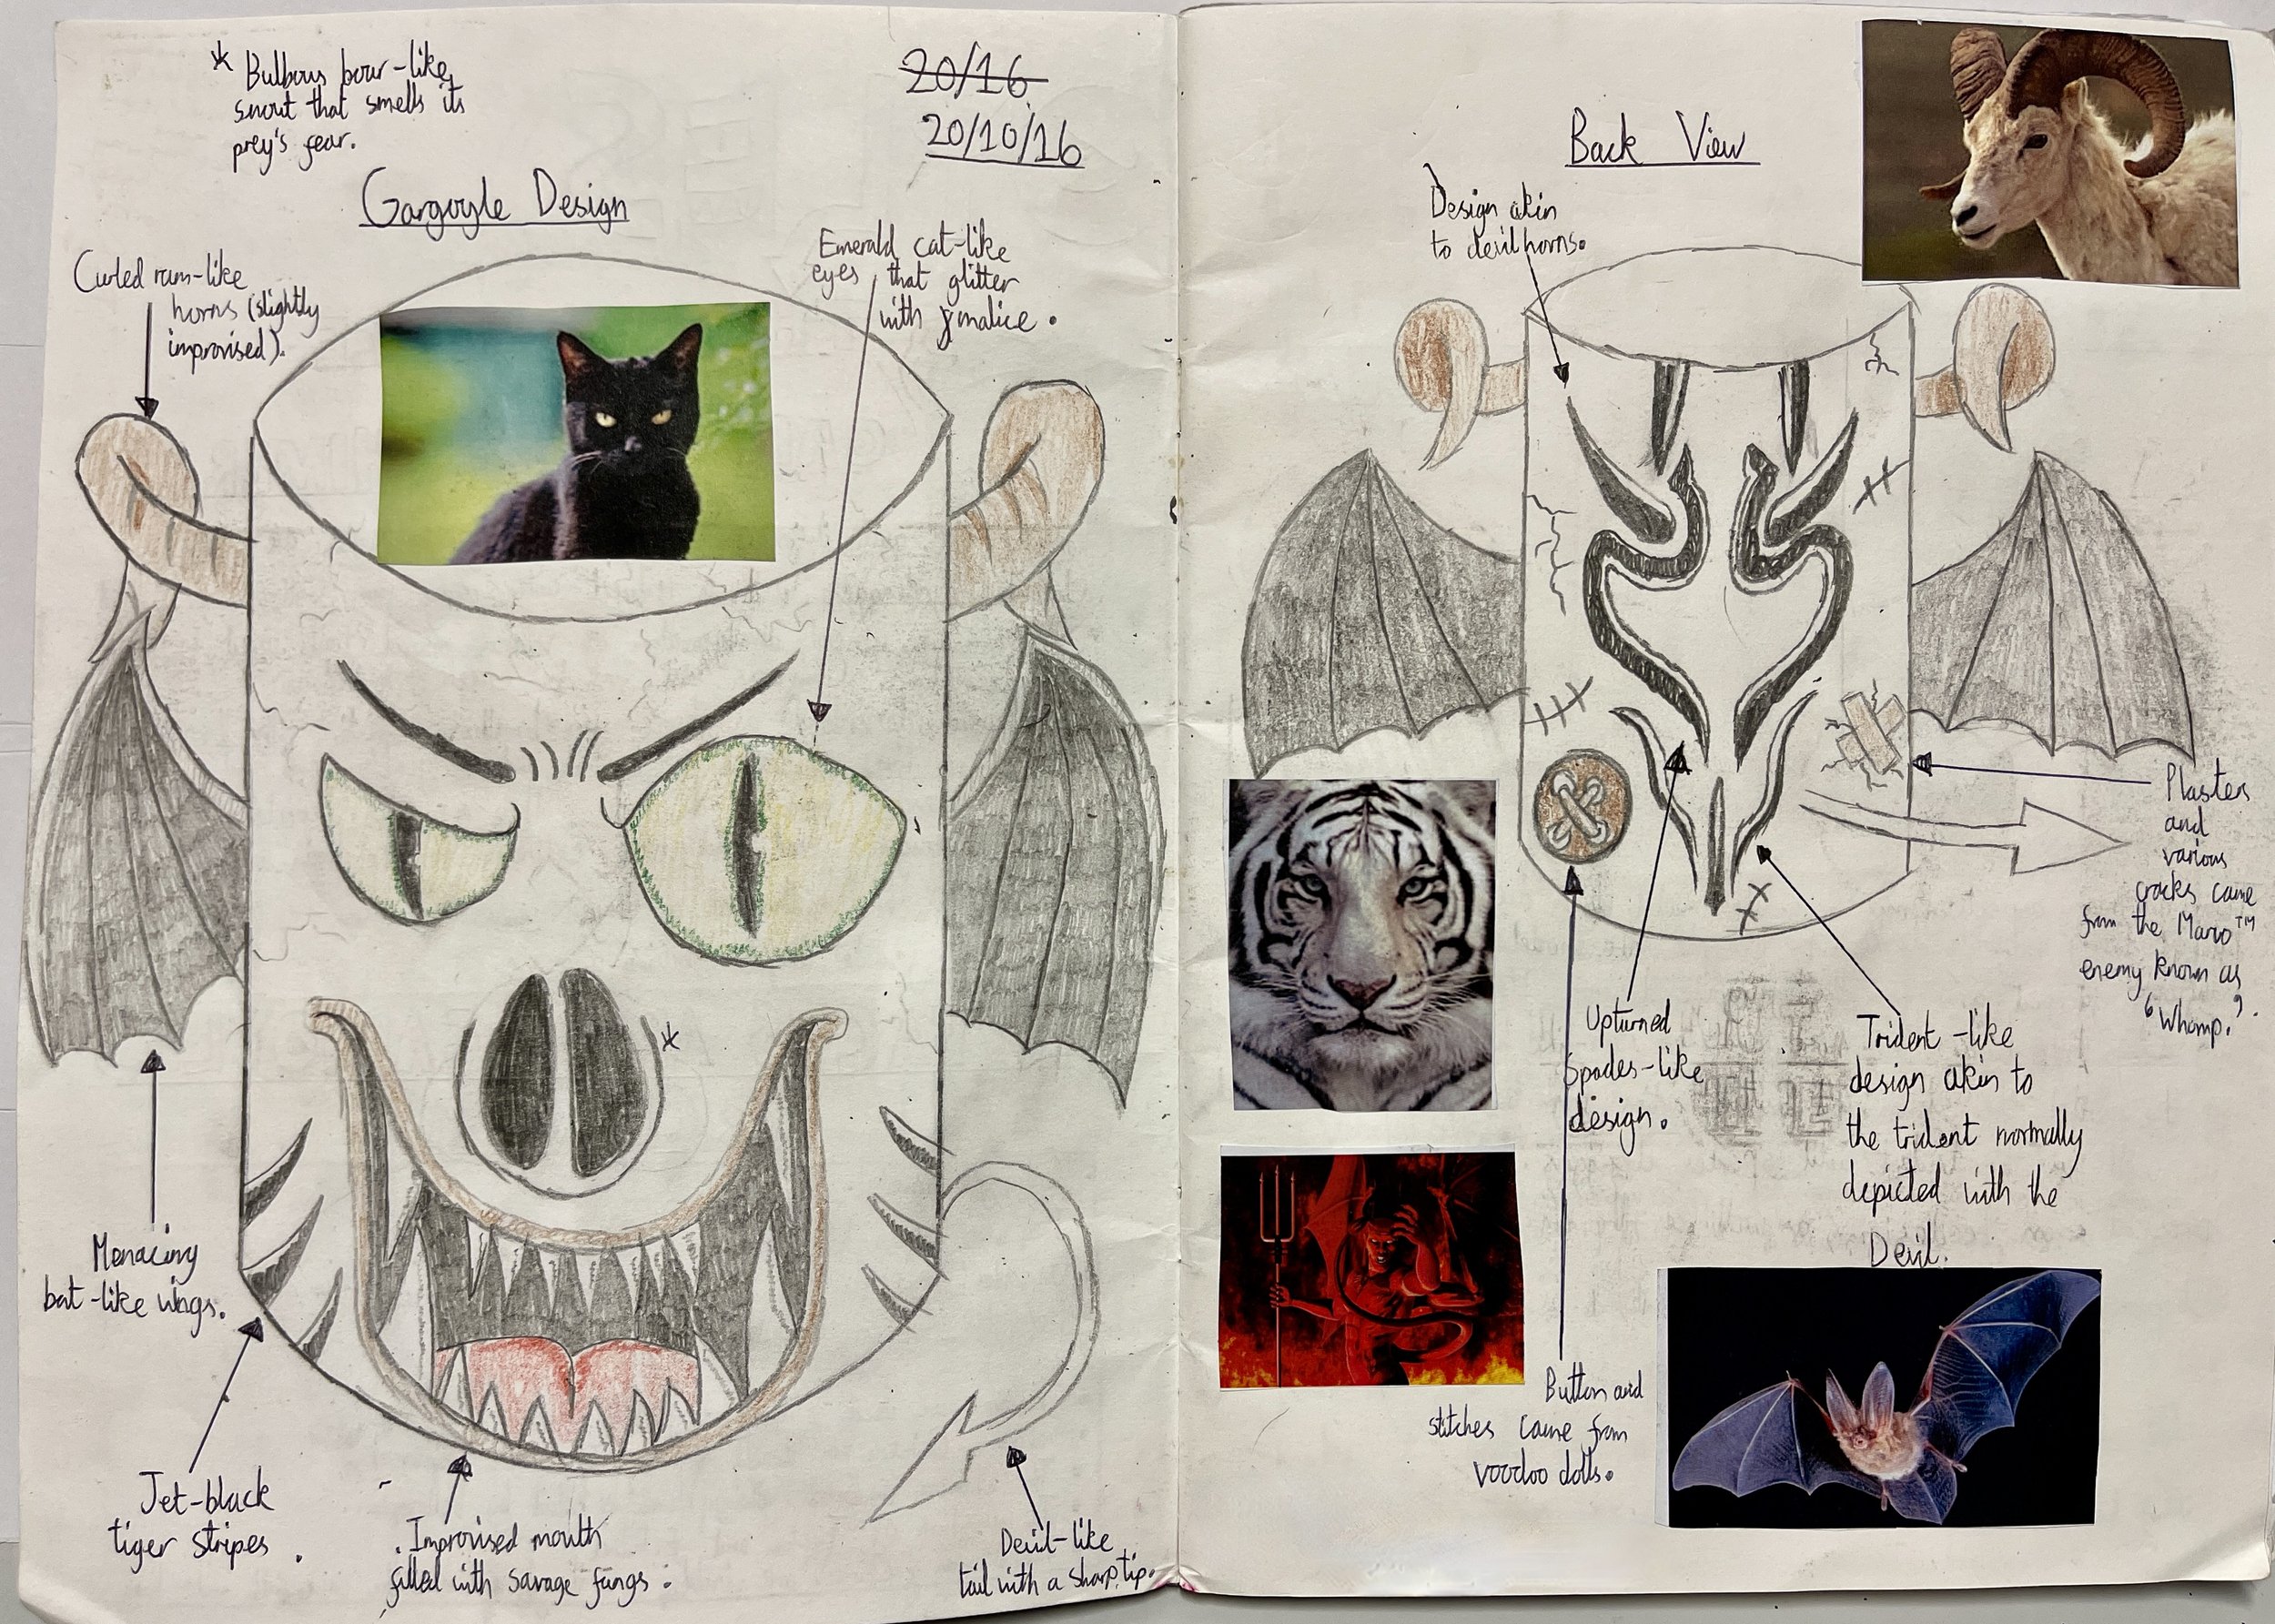
Design showing the student has been inspired by gargoyles, a snakes eye, and a pig-like nose
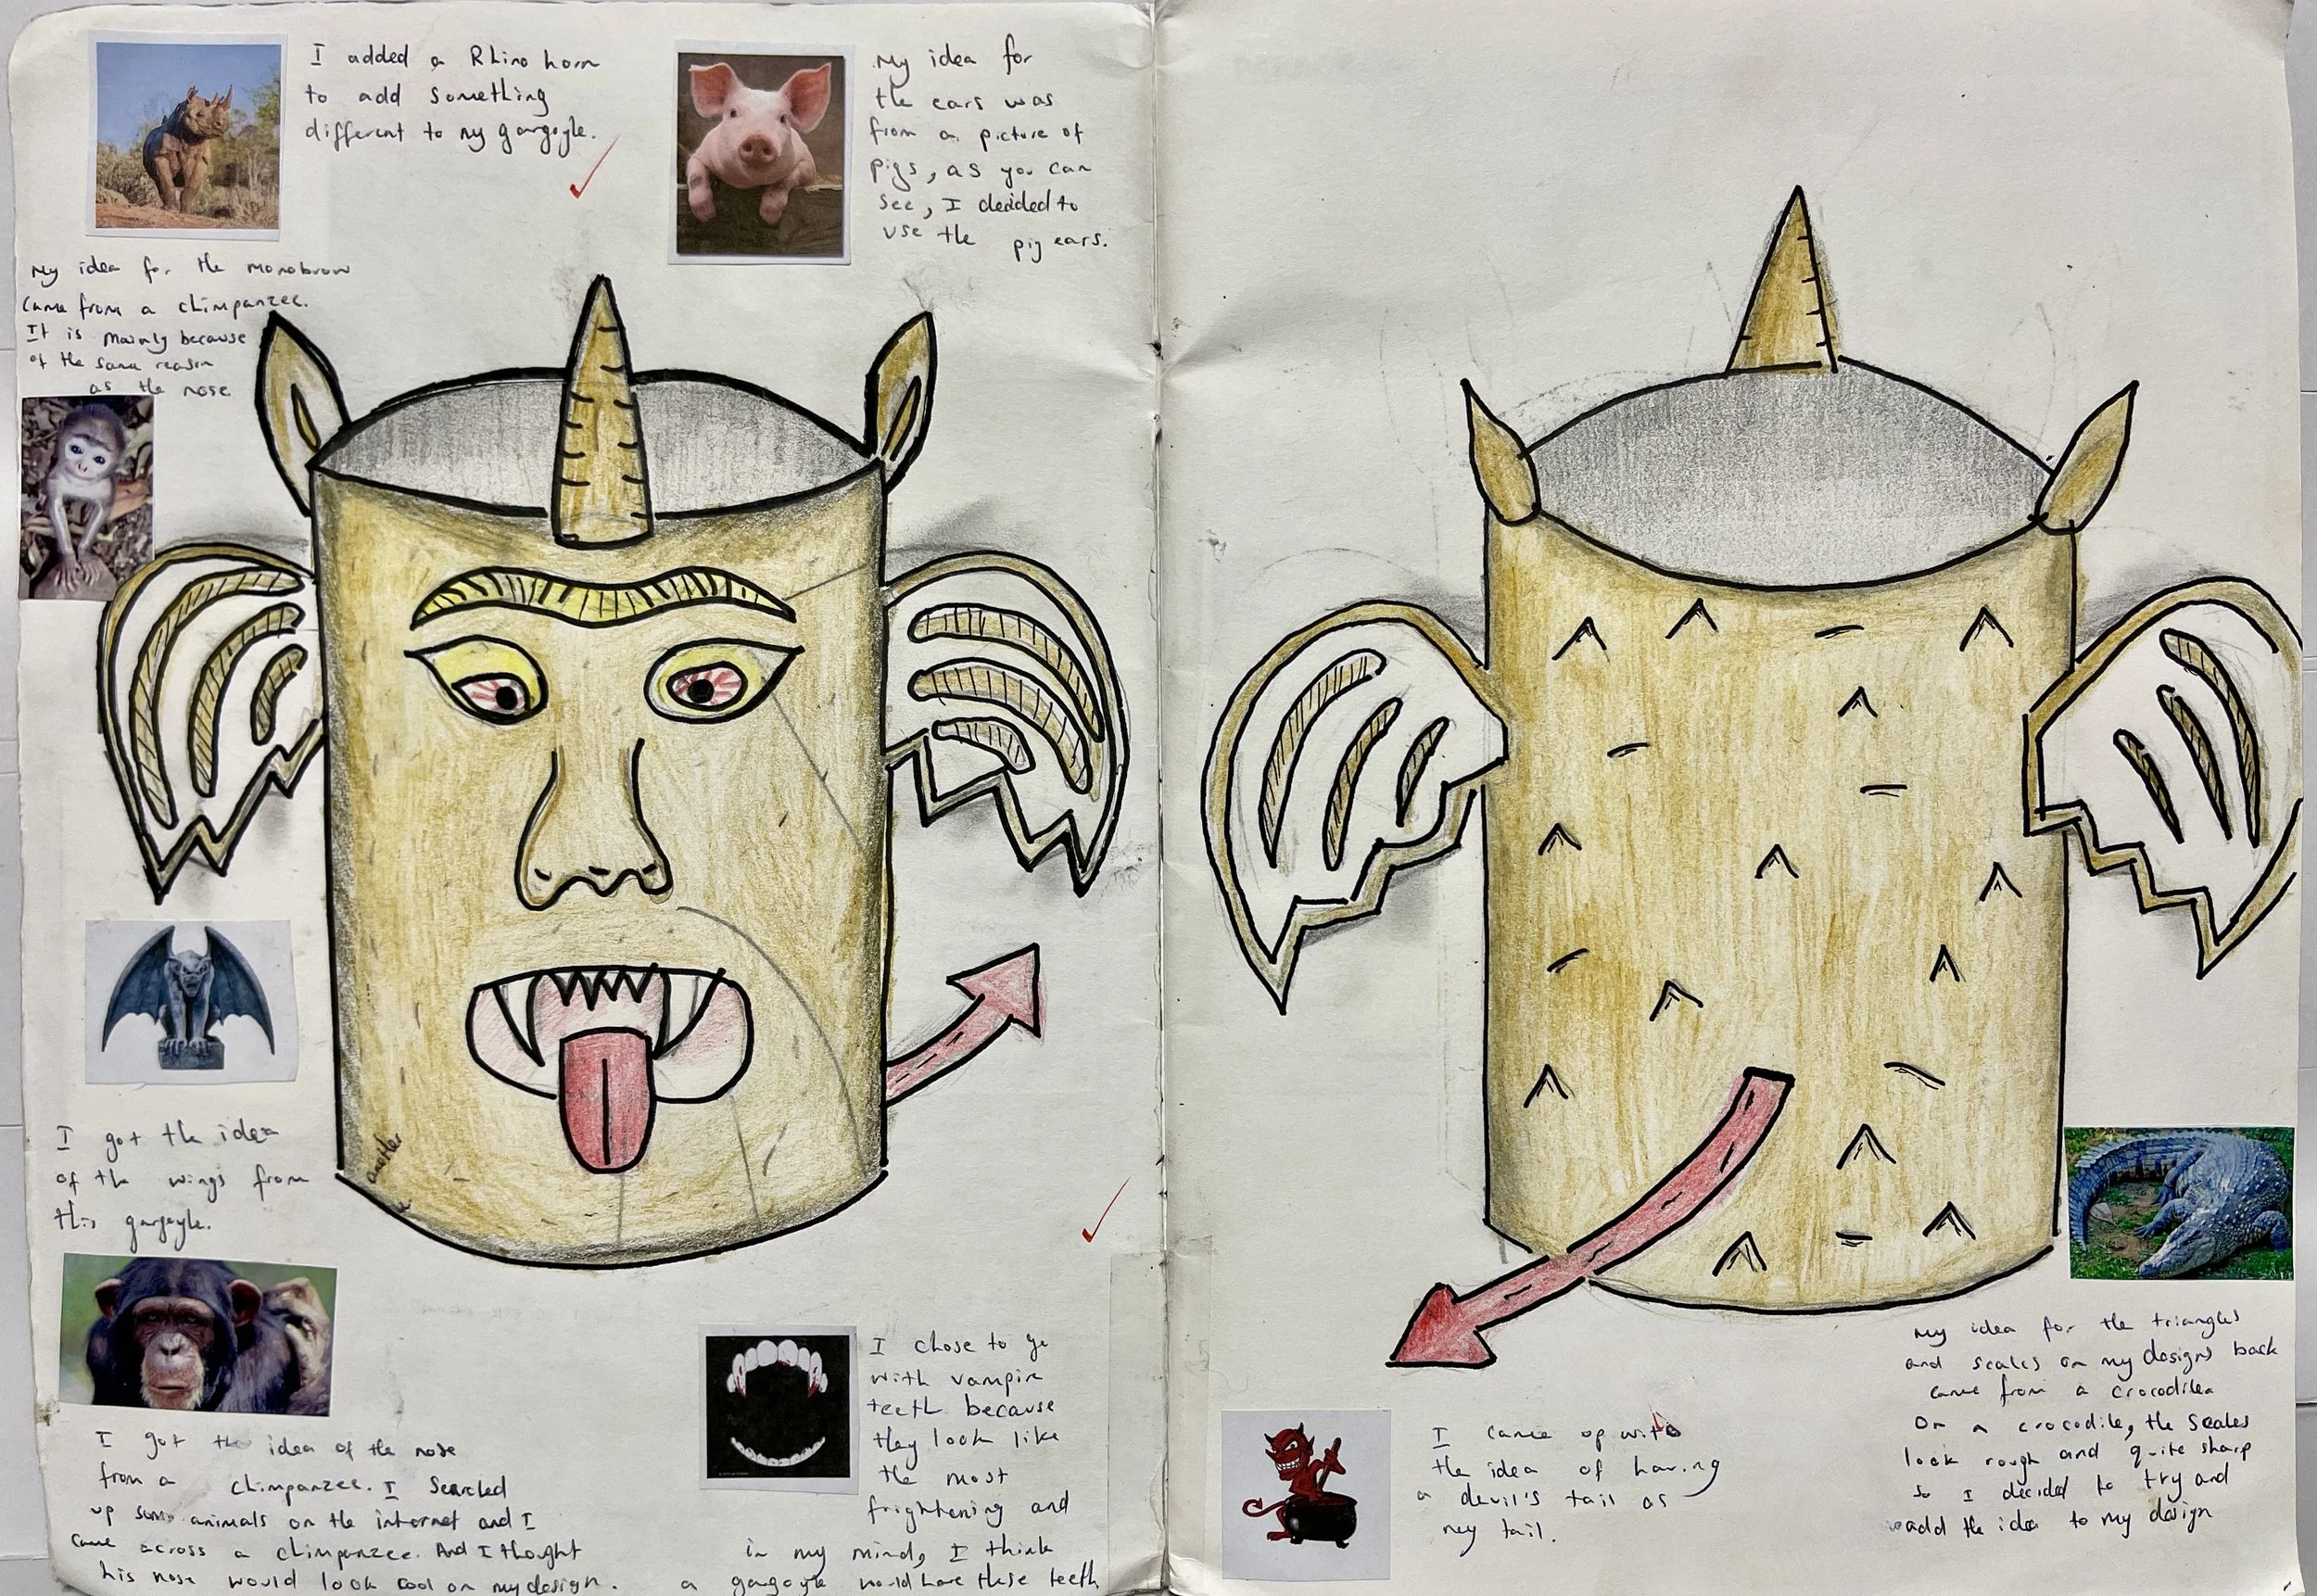
Students may choose to do their design on a single or a double sketchbook page (see examples below).
Homework: Draw out both designs and collect pictures of the gargoyles and animals that have influenced you (colour will be added next lesson). Student may also wish to watch the ‘Gargoyle Sculpture Designs - High Quality Examples’ videos below.
Gargoyle Sculpture Designs - High Quality Single Page Examples
Gargoyle Sculpture Designs - High Quality Double Page Examples
Lesson 7
Classwork : Students continue with their design a gargoyle for sculpture designs adding colour, pictures and annotations.
Homework: Students complete the design for a gargoyle sculpture in readiness to start clay work next lesson. Student will also need to bring in a the inner card part of a toilet roll and a newspaper.
Lesson 8
Classwork : Students watch the ‘Gargoyle Clay Sculpture - Lesson 1’ video below, and start making the cylinder structure and adding the bottom. Some students may also draw some of the features ready for modelling.
The ‘Gargoyle Drawing Test’ will also be completed over the next 5 weeks as homework. This will be a major pencil drawing.
Gargoyle Clay Sculpture - Lesson 1
Homework: No homework this week. Some students may be asked to improve their gargoyle sculpture design. Books will be collected in for marking.
Lesson 9
Classwork : Students set up their desk to look like the picture below.
Students then watch the ‘Gargoyle Clay Sculpture - Lesson 2’ video below, and start modelling the eyes and nose. The lesson will end 10 minutes early so that the Gargoyle drawing test homework can be explained.
Gargoyle Clay Sculpture - Lesson 2
Homework : Students draw the outline (no shading) for the Gargoyle drawing test, working from one of the pictures issued in class.
This can be a freehand drawing, although, for greater accuracy, most students will use one of the drawing techniques studied in previous lessons, such as,
the ‘measuring techniques’ used to copy the Van Gogh drawing
the ‘gridded enlargement techniques’ used for the Still-Life with Teddy Bear painting
the Collage ‘points of reference system’ used for the Collage painting
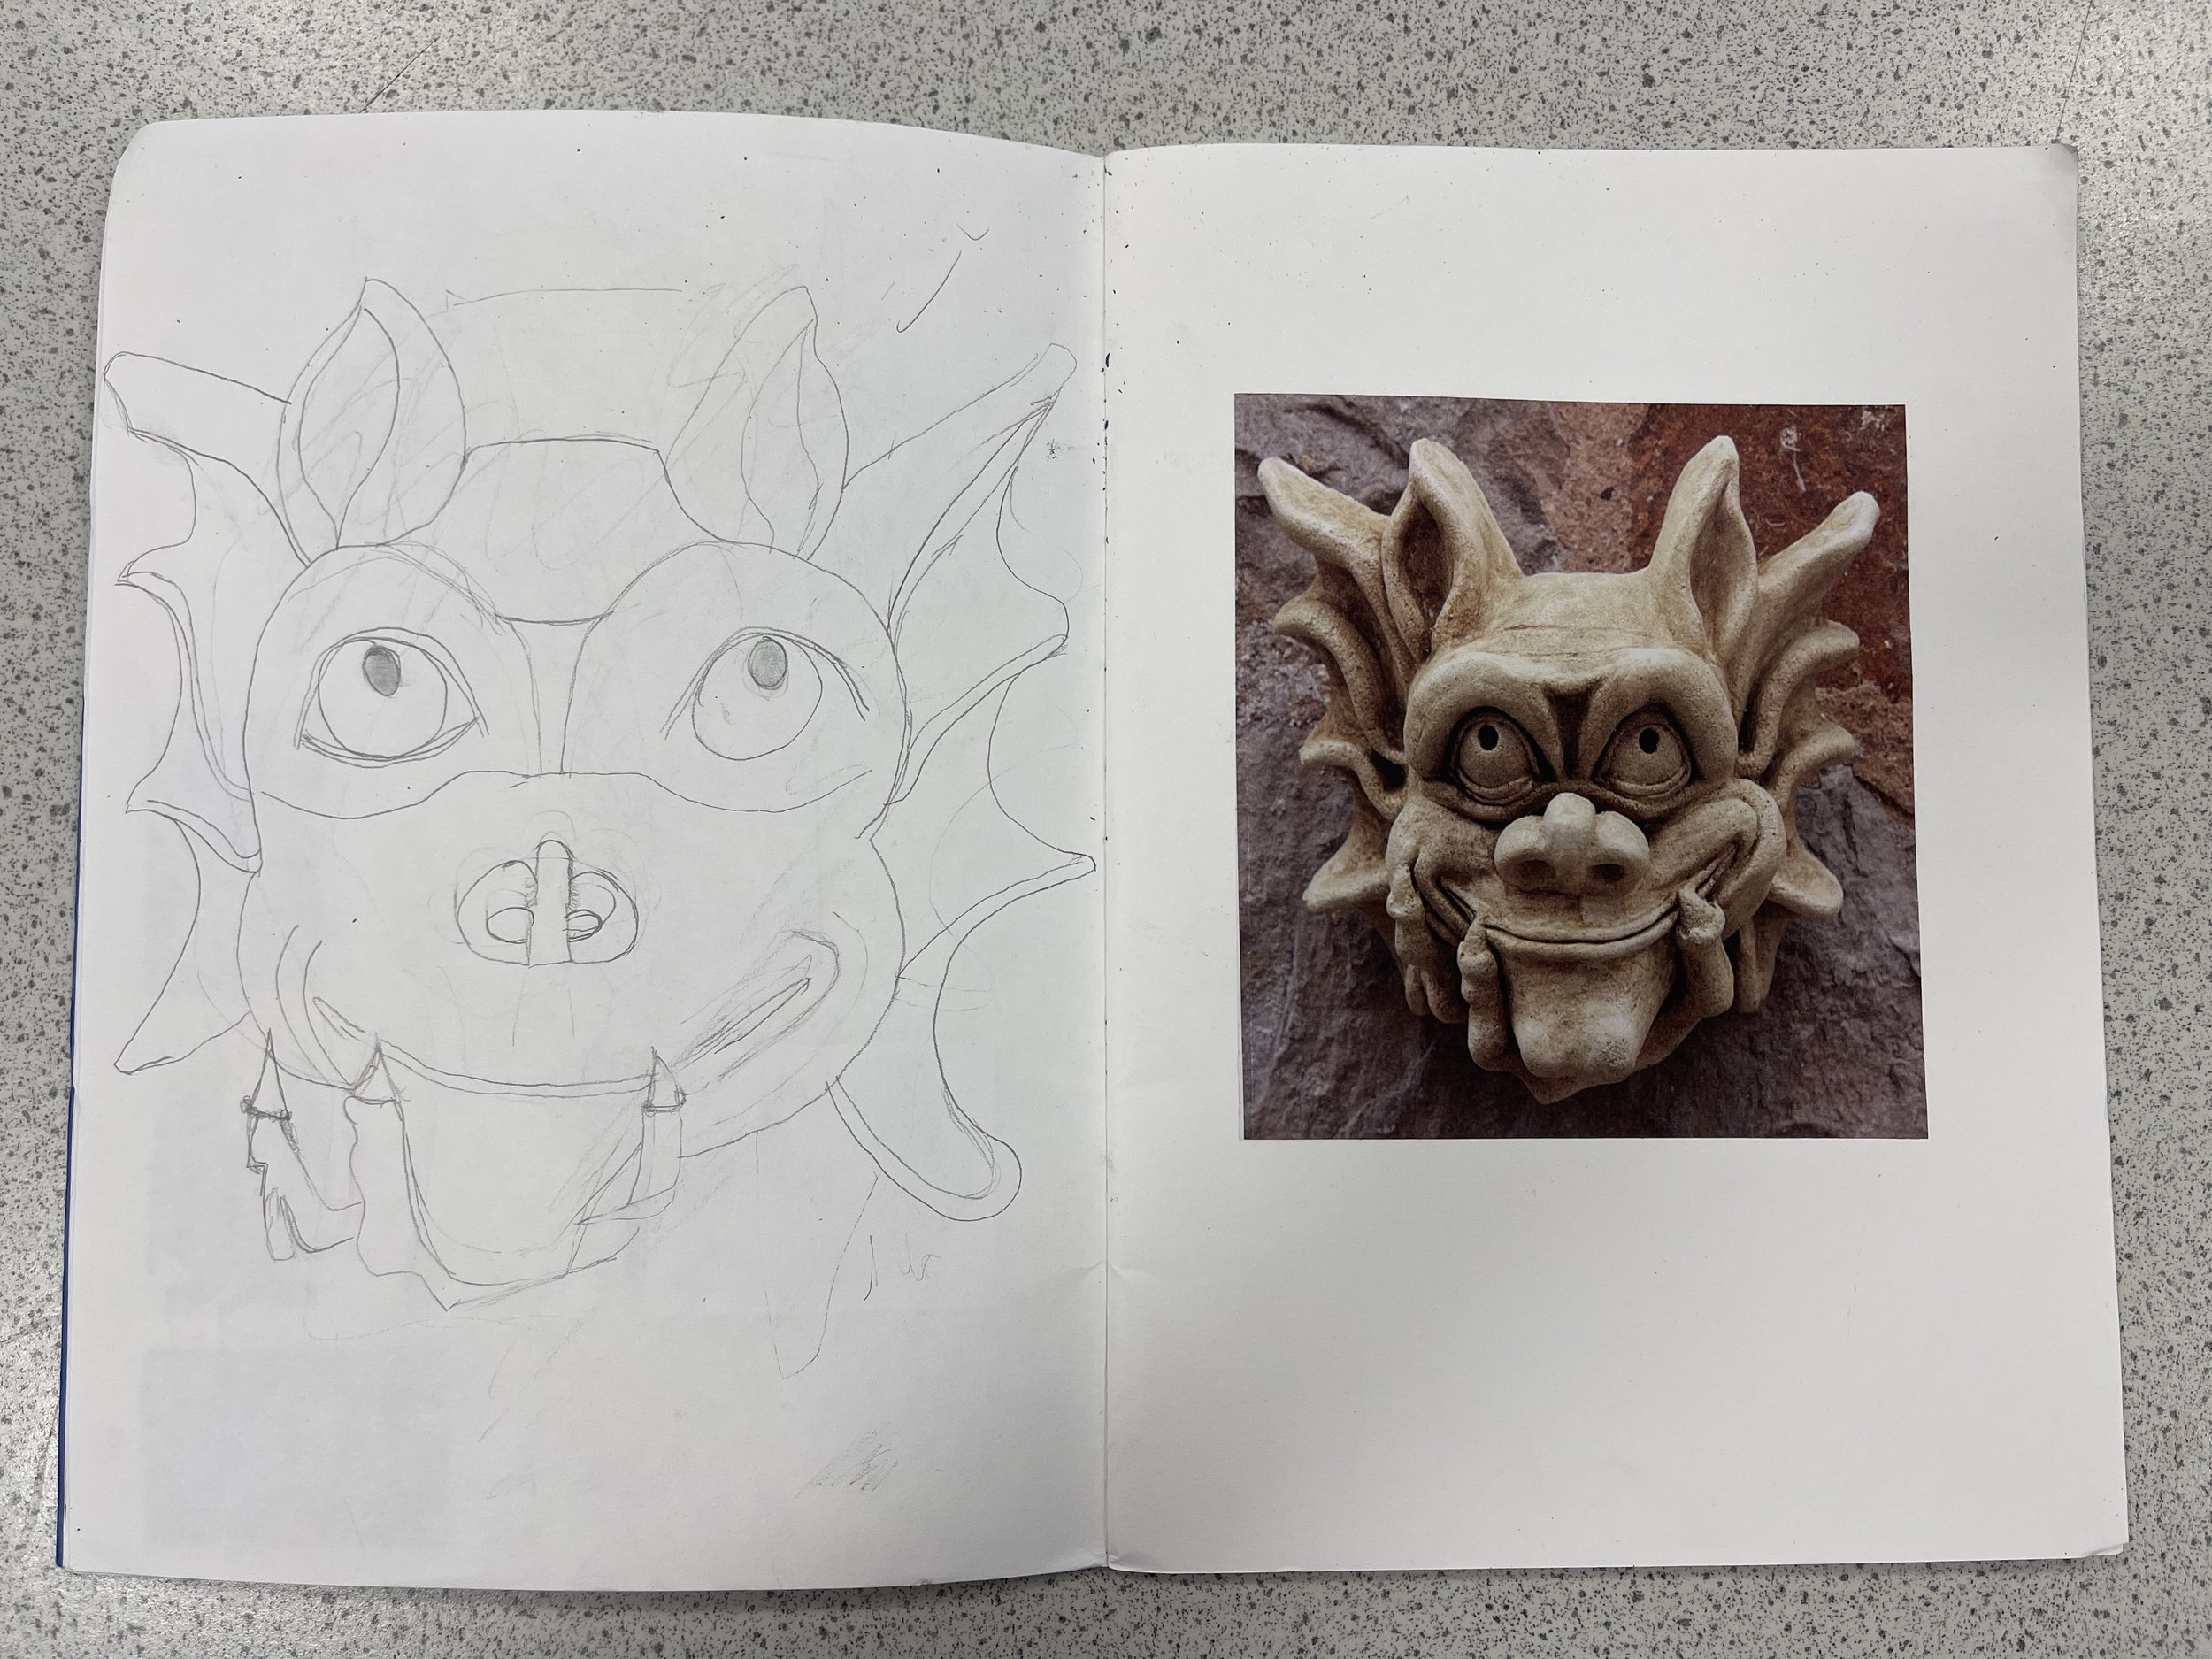
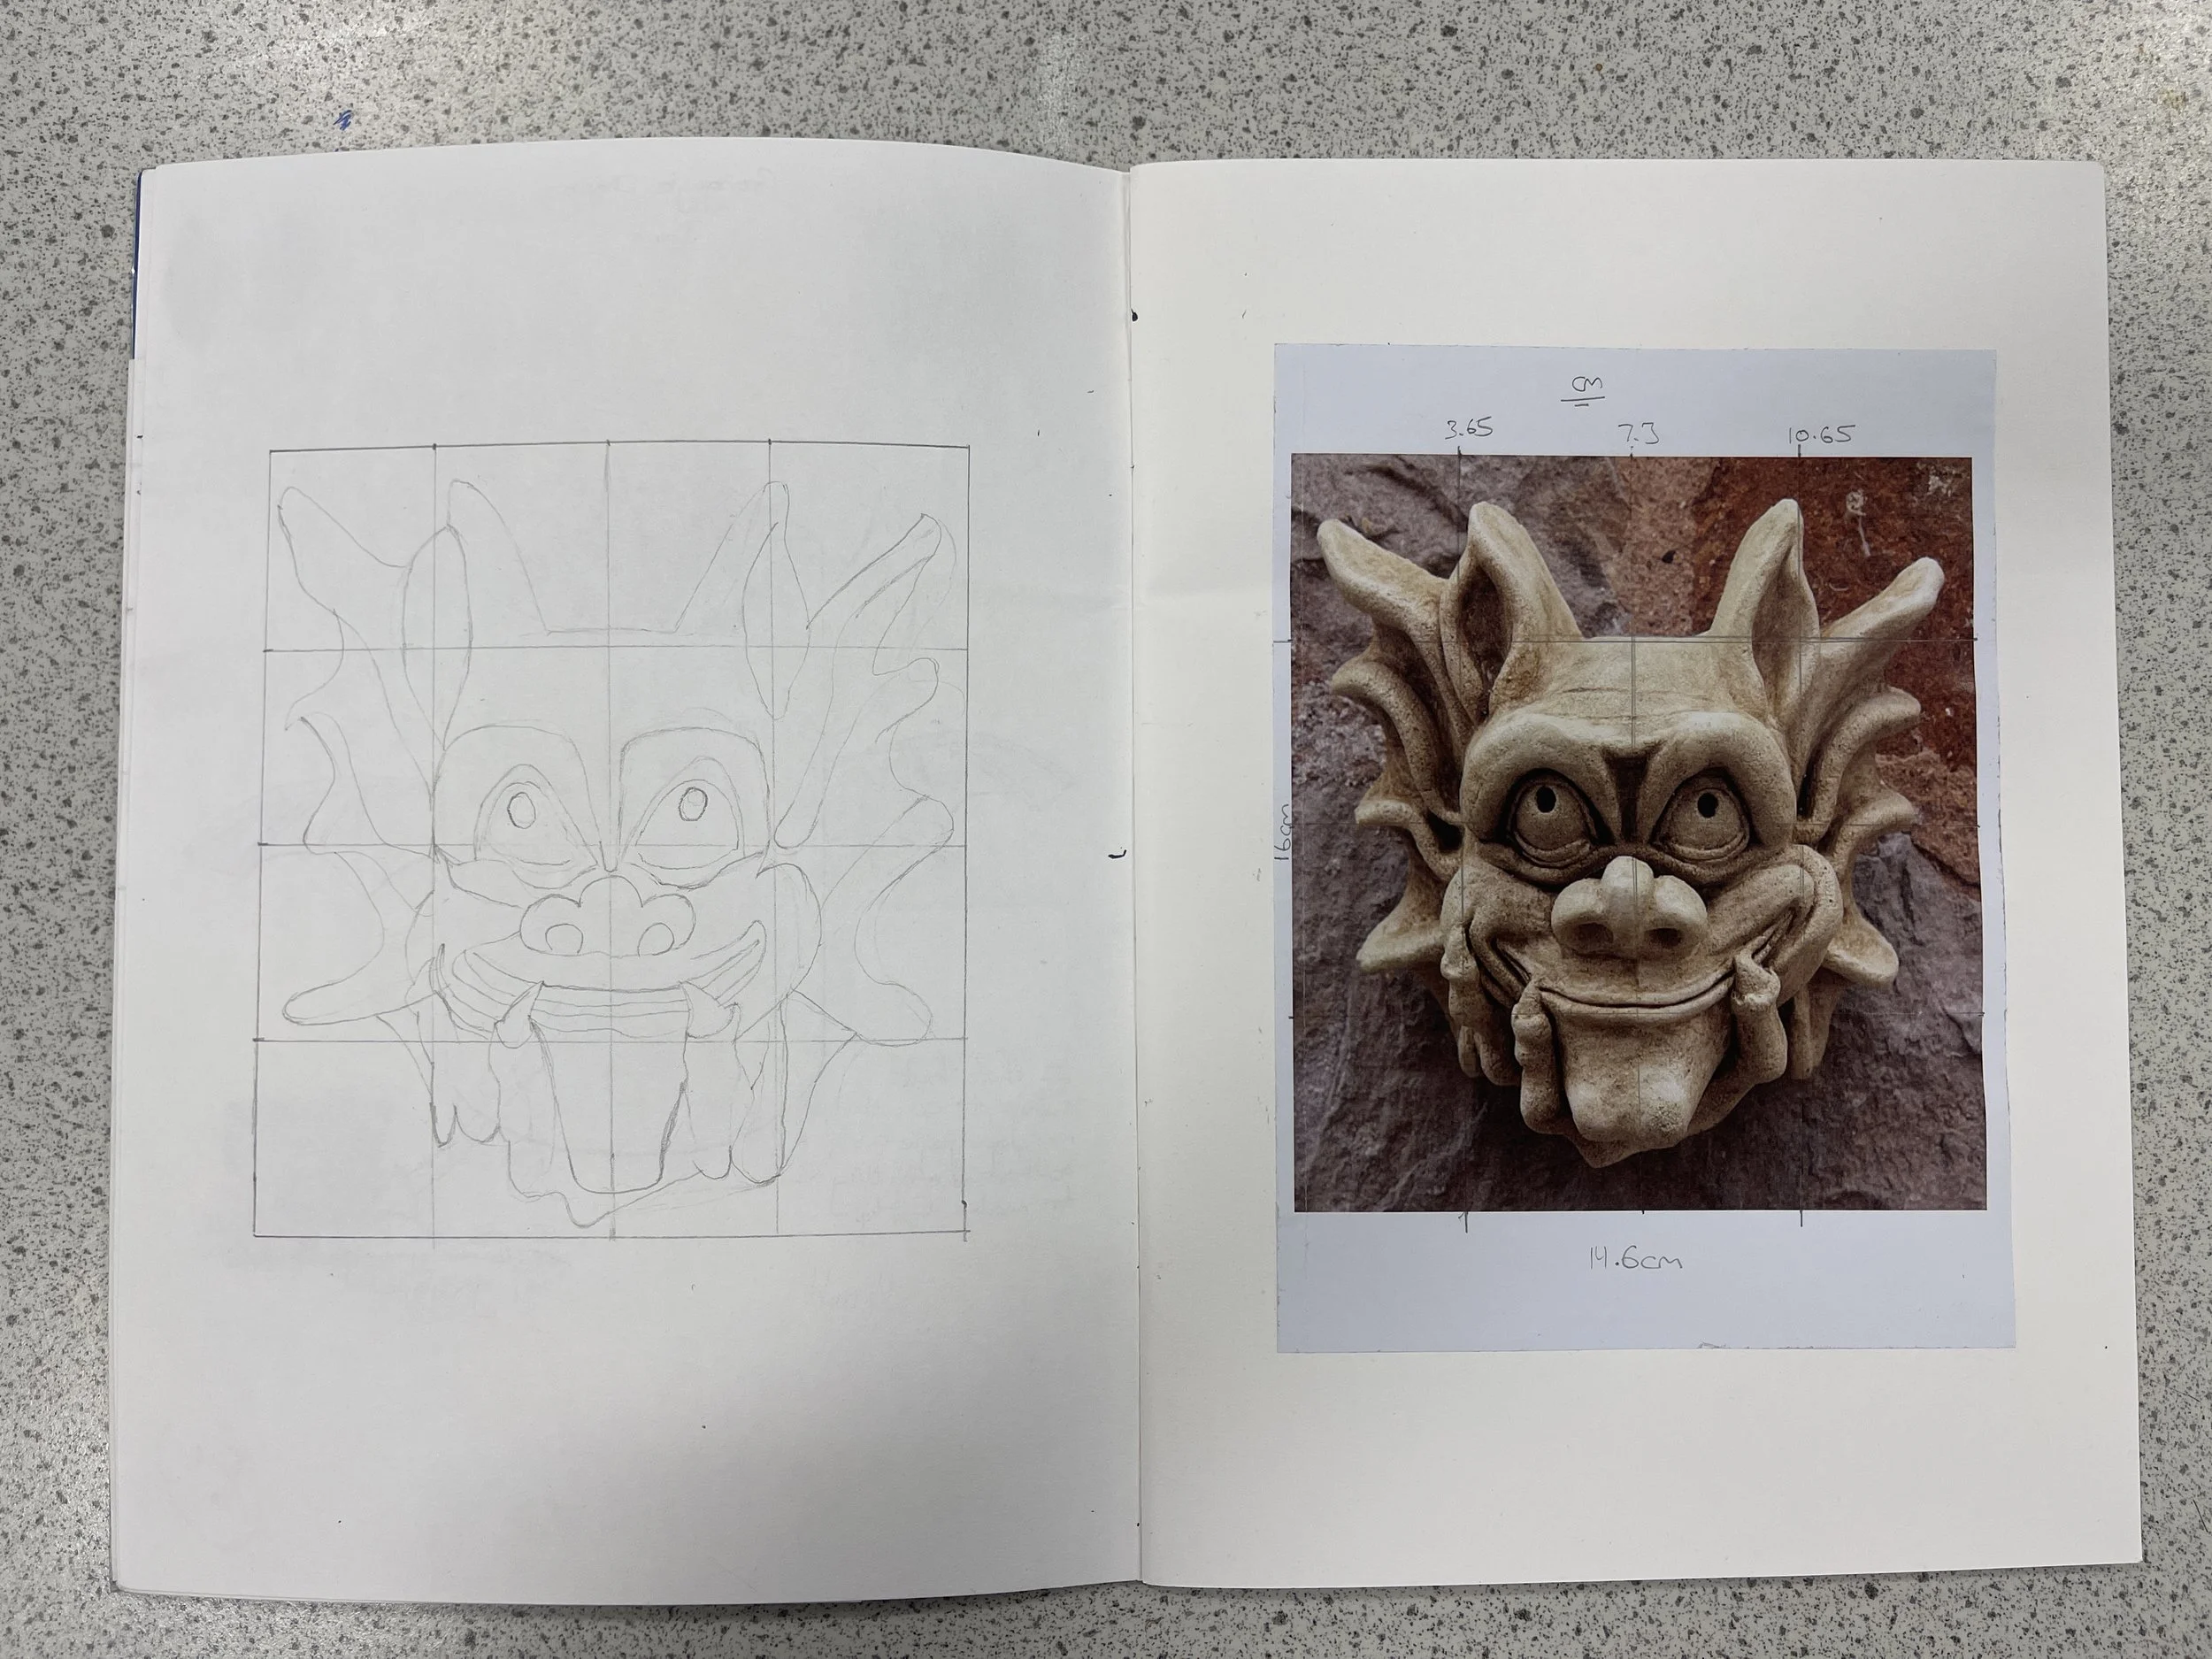
Boys who use the gridded enlargement technique tend to achieve the highest marks and levels of accuracy. See examples outline drawing shown below.
Non gridded example outline drawing
Gridded example outline drawing showing a greater level of accuracy
Lesson 10
Classwork : Students watch the ‘Gargoyle Clay Sculpture - Lesson 3’ video below, and continue modelling the Gargoyle Clay Sculpture.
Gargoyle Clay Sculpture - Lesson 3
Homework : Students continue to work on the Gargoyle drawing test adding tone and detail to about 20% of the drawing.
If students wish to continue work working on the Gargoyle Clay Sculpture at lunch, or even take it home (although this is best done in the week proceeding the final lesson), they should watch the video below.
Lesson 11
Classwork : Students continue modelling the Gargoyle Clay Sculpture. There are 3 lesson remaining to complete the sculpture.
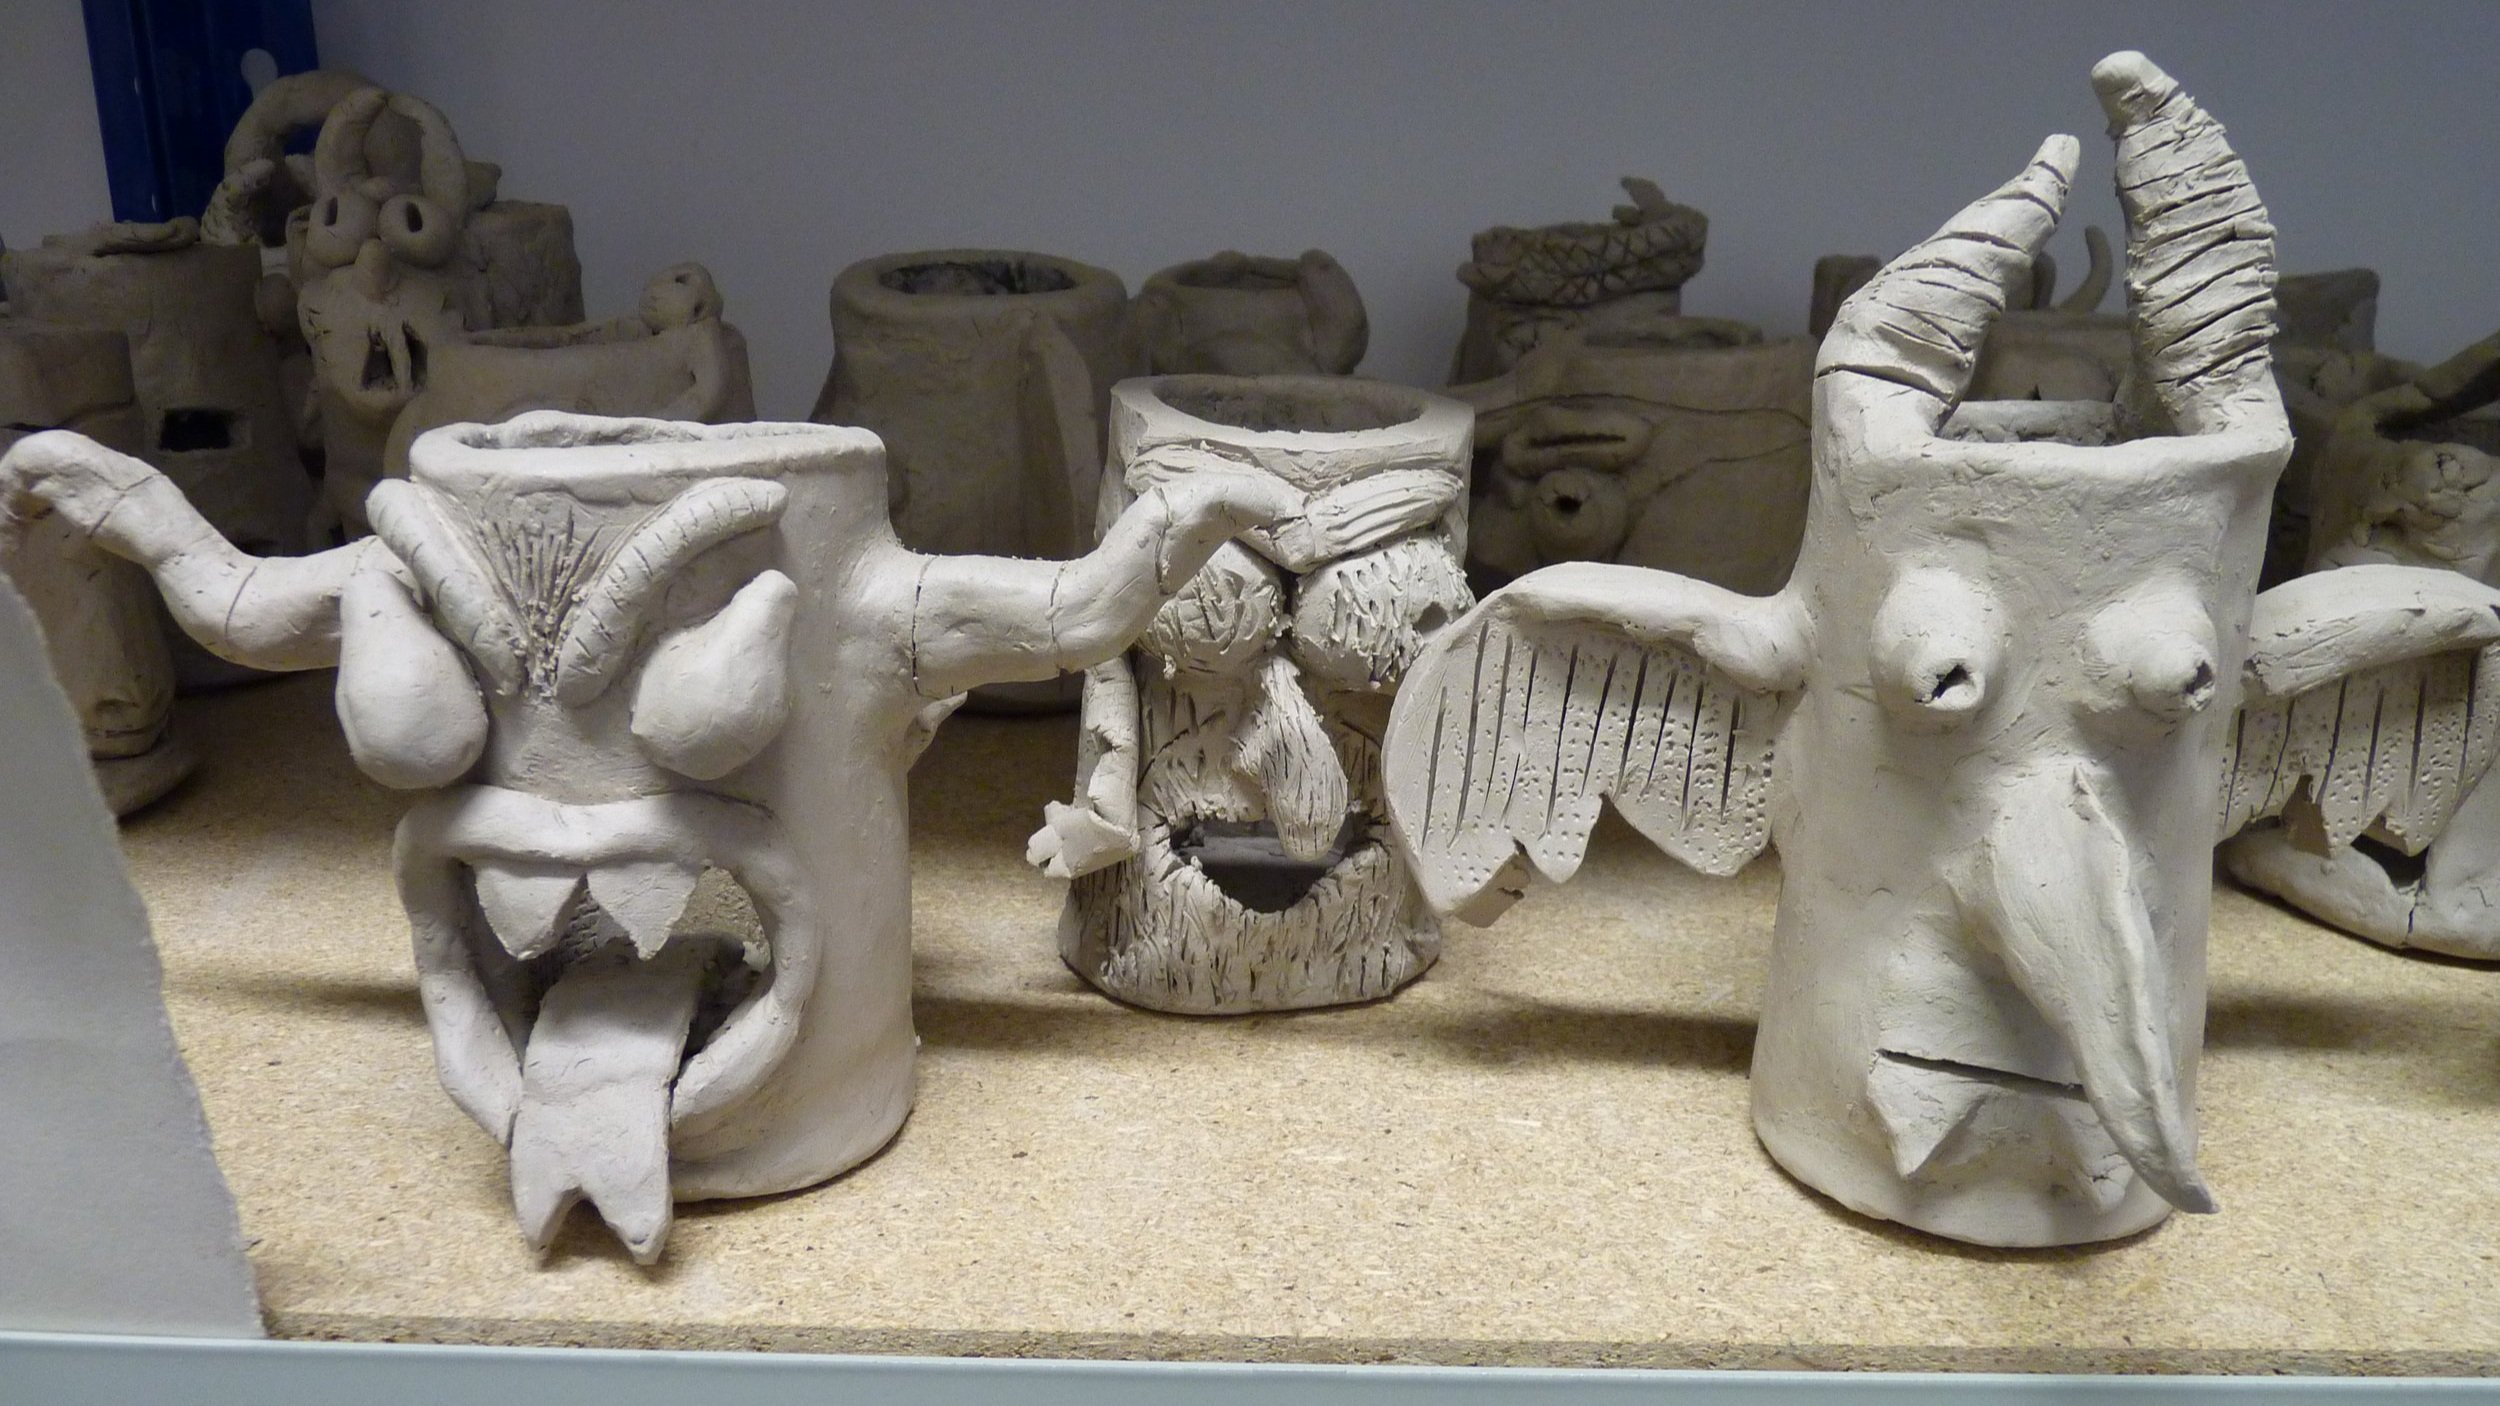
Below are some examples of final Gargoyle Clay Sculptures before going in the kiln for ‘firing’.
Homework : Students continue to work on the Gargoyle drawing test adding tone and detail, and aim to complete about 50% of the drawing. Student may also wish to watch the ‘Gargoyle Drawing 1 & 2 - Assessment Examples’ videos below.
Gargoyle Drawing 1 - Assessment Examples
Gargoyle Drawing 2 - Assessment Examples
Lesson 12
Classwork : Students continue modelling the Gargoyle Clay Sculpture. There are 2 lesson remaining to complete the sculpture.
Homework : Students continue to work on the Gargoyle drawing test.
Lesson 13
Classwork : Students continue modelling the Gargoyle Clay Sculpture. This is the last lesson to complete the sculpture.
Homework : Students complete the Gargoyle drawing test.
Lesson 14
Classwork : Students now have two lessons to write up the Gargoyle Clay Sculpture evaluation.
Note: that if any student has not completed the Gargoyle drawing, this must be completed in class and the sculpture evaluation with not to be written wholey as homework.
The evaluation includes a photograph of the clay model in the top left of the page (students will need to print this in their own time - approximate size will be a quarter of an A4 sheet). For the evaluation student include 4 detailed paragraphs based on,
Paragraph 1 – Design Ideas and Model Changes and Reasons
Paragraph 2 – Making processes and Techniques (Starts with the toilet roll/ends with taking a photograph. Re-watch the demonstration videos to be sure not to miss out any of the processes)
Paragraph 3 - The firing and glazing process
Paragraph 4 – Final Evaluation (What went well/Even better if?)
Firstly students use the ‘Gargoyle Sculpture Literature Handout’ to list KEY VOCABULARY and GAIN AN UNDERSTANDING OF THE FIRING PROCESS. Students start by listing the key vocabulary they might use (for Paragraphs 1 and 2), then high-light key information on the firing process (for Paragraph 3). Finally, can be shown the list of ‘Designing’ and ‘Making’ vocabulary and reflect on any omissions.
Homework : Students should aim to complete approximately half of the Gargoyle Clay Sculpture evaluation. There is one more remaining to complete this work. Also, remember that students should have completed the Gargoyle drawing test by now
Lesson 15
Classwork : Students contine to write up the Gargoyle Clay Sculpture evaluation.
Homework : Students complete the Gargoyle Clay Sculpture evaluation.


