Year 8 - Linear Perspective Unit
( if you miss the lesson for any reason you should still complete both classwork and homework)
Lesson 1
Classwork : Students initially watch the two introductory videos to perspective shown below. Students need to gain an understanding of terms like one point perspective, two point perspective, vanishing point, true horizon, eye level and foreshortening.
Introduction to One Point Perspective
Understanding Linear Perspective
After this students watch the ‘Perspective Heading 1’ video below and then use ‘one point perspective’ to draw a PERSPECTIVE heading in their sketchbook (they do not add colour at this stage).
Perspective Heading 1
Homework : Complete the PERSPECTIVE heading (but do not add colour).
Lesson 2
Classwork : Students should watch the ‘Perspective heading 2’ video below and now aim to transform their ‘one point perspective’ PERSPECTIVE heading into a ‘two-point perspective’ heading. After this students should aim to make the heading look truly three dimensional by adding colour to their work using different tones of colour pencil.
Perspective Heading 2
Homework: Complete the ‘two-point perspective’ heading making it look truly three dimensional by using different tones of colour pencil. Students may also wish to go around the heading with a fine liner.
Lesson 3
Classwork : Students watch the ‘Perspective in the National Gallery’ video and complete the video questionnaire (this has been posted to students). Please note that the video is currently not shown on sacart due to copyright restrictions but a private link will be posted into Teams at the start of the lesson.
The video is 20 minutes long but can be paused or replayed to ensure students are able to answer all questions. The ‘Perspective Video Questionnaire’ sheet should finally be stuck neatly in sketchbooks (on the next page to the one where students completed the Perspective heading).
The remainder of the lesson can be used to make improvements to the ‘two-point perspective’ heading.

Homework: There is no homework this week.
Lesson 4
Classwork : Students watch the ‘perspective Street Scene 1’ video below. They then practice drawing the street scene onto the worksheet as explained in the video.
Perspective Street Scene 1 - Re-Cap and Street Scene Practice Drawing
Homework: Students continue the practice drawing street scene as explained in the video.
Lesson 5
Classwork : Students continue to copy the one-point perspective ‘normal view’ street scene onto the ‘perspective template’ handout from lesson 5.
When students have understood the practice street scene drawing (the complete street does not need to be drawn on the handout sheet), they should watch the ‘Perspective Street Scene 2’ demonstration video below, and then start copy the ‘normal view’ street scene again in sketchbooks. This work needs to be completed under the perspective heading produce last term.
Perspective Street Scene 2 -The Main Street Scene Drawing
Homework: No homework as students will be revising for their Summer examinations.
Lesson 6
Classwork : Students continue to copy the one-point perspective ‘normal view’ street scene in sketchbooks. This work needs to be completed under the perspective heading produce last term.
Homework: Complete the normal view’ street scene in sketchbooks and write the ‘Normal Viewpoint’ paragraph below the drawing.
Lesson 7
Classwork : This is the final linear perspective lesson. Those student still experiencing difficulty understanding linear perspective with be given additional support.
Students showing a good level of understandg can either,
Complete the ‘high viewpoint’ or ‘low viewpoint’ street scene, or
Complete a ‘one-point linear perspective drawing of a bedroom’ (dimensions and guidance are shown below)
The bedroom should have a bed on the left and a poster on the wall. On the right is a desk, chair, and a door. Final on the ceiling there is a light and on the floor there is a mat. It is highly recommended that students use the following dimension to help them.
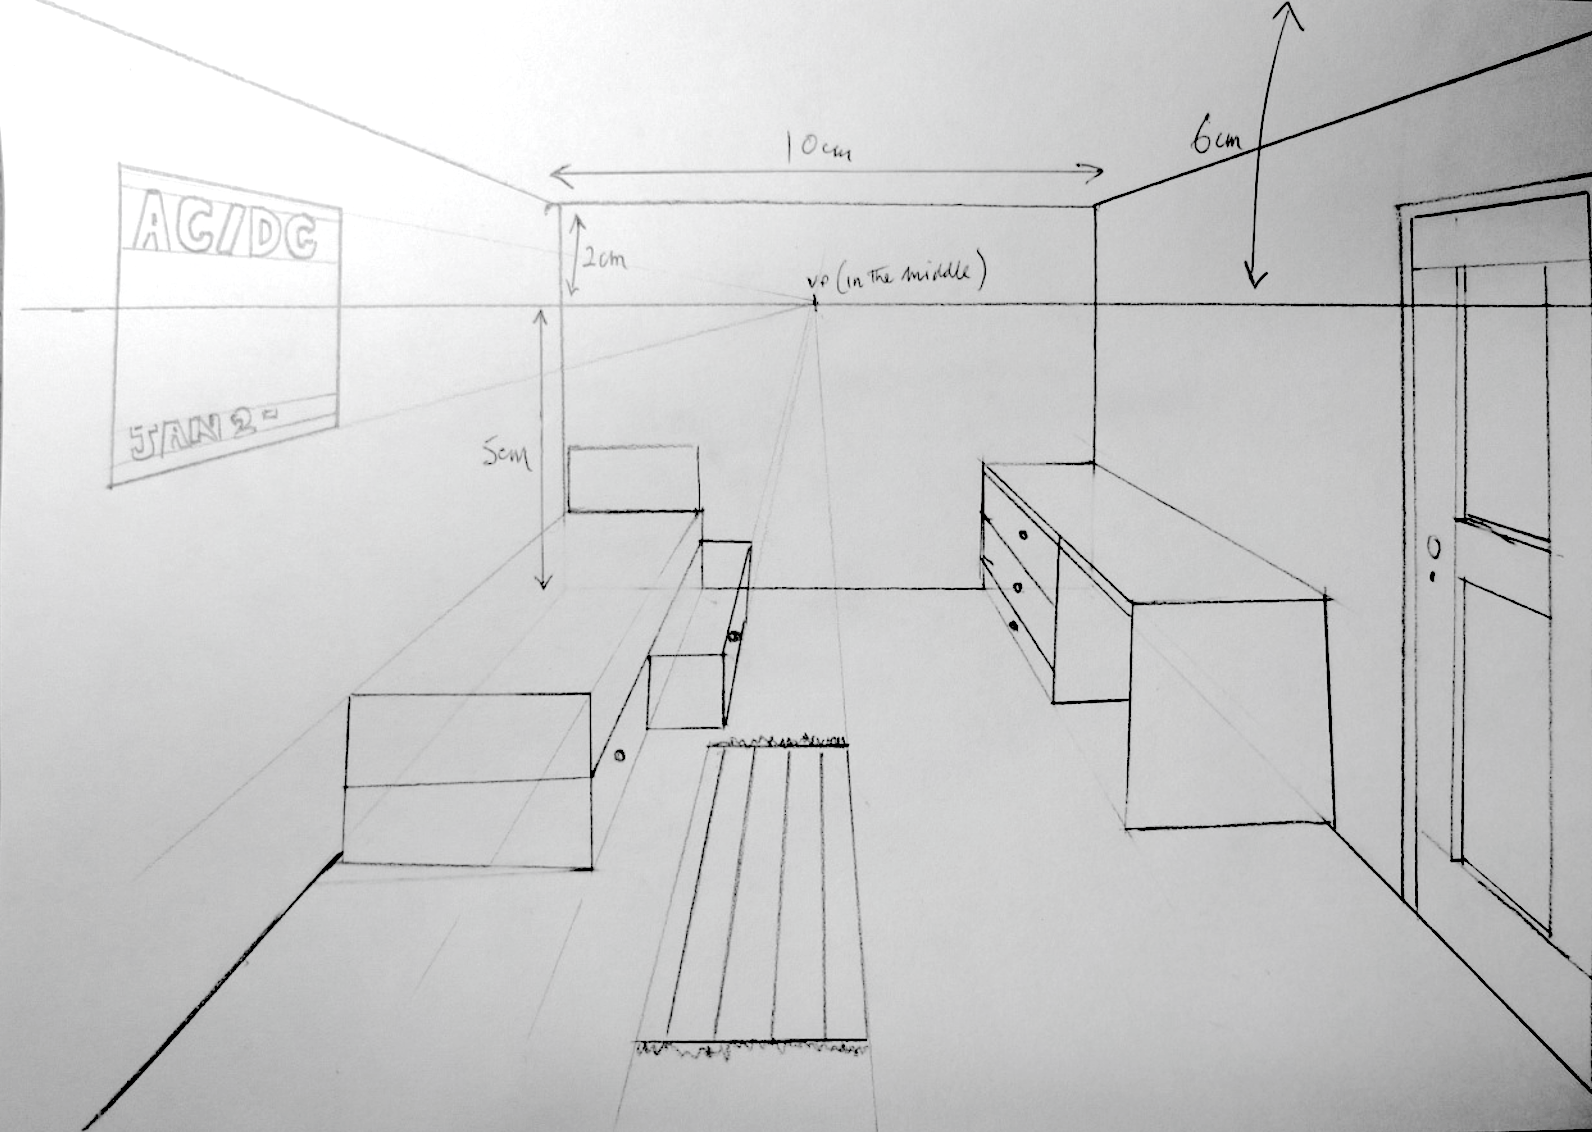
One-point linear perspective drawing of a bedroom dimensions
Tips on what to draw first:
Draw in the ‘eye level’ 6cm from the top of the page
Put in the ‘vanishing point’ in the middle
Draw in the back wall (10cm wide and 7cm high) - 2cm above the ‘eye level and 5cm below
Next draw a poster
To draw the bed and desk start off with drawing the correct size ‘boxes’ against the relevant walls
Some example draings can be seen below,

Excellence + High level of understanding and wonderful extra level of detail. The only item that looks incorrect is the TV

Secure Good level of understanding (but the door looks too short, the chair isn’t in perspective, and looking up at the lamp one should see the bulb)

Secure Secure level of understanding (but the door looks a little short, the chair isn’t in perspective, and the desk is too long’ so the furthest end looks like it’s floating above the ground)
Homework: Students need to complete any outstanding work in readiness for an assessment of their understanding of linear perspective.