Year 7 - Composition and Still Life Unit
( if you miss the lesson for any reason you should still complete both classwork and homework)
This unit of work is about:
Learning about Still Life painting
Enlarging a photograph for painting
Improving and developing fine painting skills
Mixing and matching colours and textures
UNIT ARTISTS: Still life, Michelangelo Merisi de Caravaggio, Pieter Claesz, Francisco de Goya, Gustave Courbet, Paul Cezanne, Georges Braque, Pablo Picasso, Salvador Dali, Albert Renger-Patzsch, Andy Warhol
UNIT VOCABULARY: Composition, Still life, Gridded Enlargement, Testing and Matching Colour, Texture, Colour, Hue, Tint, Tone, Shade, Primary Colours, Secondary Colours, Tertiary Colours, Mixing, Blending, Fine Brush Work, Memento mori, Vantias
Lesson 1
Classwork : Firstly students discuss the meaning of the term ‘Still life’ and are given the ‘10 Important Still Life Artworks’ handout to stick in sketchbook.

Students then receive two Teddy Bear Still Life pictures and tracing paper. They should then watch the ‘Still Life - Selecting and tracing the best composition’ video below and trace the composition they wish to paint. Use a telescopic pencil, ruler, and accurate measurements. Remember to work lightly as you only have one piece of tracing paper.
The only difference this year is that students will select their best composition to trace using the 9cm x 14cm rectangle drawn on the tracing paper (we will not be issuing the transparent windows). Any students completing the tracing before the end of the lesson can continue to copy the second artists drawing.
Still Life Selecting Composition and Tracing
Homework : Students should complete the tracing. Students should also bring in paints and brushes for the next lesson.
Students also need to write out the following Important Facts about Still Life Art information in sketchbooks. Try to highlight the key points using colour pencil.
· Still life includes all kinds of man-made or natural objects, cut flowers, fruit, vegetables, fish, game, bottles, fabrics, and so on.
· Still-life is generally thought to have been invented in the sixteenth century, but Roman mosaics of still life object have been discovered dated from the second century.
· Still life can be realistic or abstract, and can made by painting, drawing, sculpture, photography, or any type of art.
· Still life was often a celebration of material pleasures such as food and wine, or often a warning of the ephemerality (lasts a short time) of human life (see memento mori).
· Memento mori is a Latin phrase meaning ‘remember you must die’. A basic memento mori still life painting might include a skull, an hourglass, clock, or an extinguished candle. All items signify that human life ultimately ends with death.
· Vanitas still life painting is very similar to memento mori, but often includes musical instruments, books and wine (representing the ‘vanity’ of worldly pleasures).
· In the seventeenth century the French Academy created a hierarchy of the different types of painting. First was history painting, then portraiture, then genre painting (scenes of everyday life), then landscape, and still life which was ranked at the bottom. Still life and landscape were considered lowly because they did not involve human subject matter.
Lesson 2
Classwork : Students use watercolour painting paper for the still life enlargement. They should then watch the ‘Still Life - Enlarging Using a Grid’ video and start the gridded enlargement as describe in the video. Remember to work lightly so that any mistakes can be erased and pencil lines do do show through after the work is painted.
Still Life - Enlarging Using a Grid
Homework : Complete the still-life gridded enlargement drawing in readiness for starting to paint next lesson. Also bring in paints and brushes.
Note: If sketchbook have been collected for marking, student will be given time to complete the still-life gridded enlargement drawing next lesson.
Lesson 3
In the lesson students will be asked to paint only one of the objects for your still-life painting. The objects must be painted in the following order (so if you don’t have the egg cup you should start with the beaker). You must show the practice painting as well as the final painted object.
egg cup
beaker
milk jug
lemon
orange
Before starting to paint students should watch the relevant demonstration video below.
Egg Cup and Beaker Demonstration Painting
Milk Jug Lemon and Orange Demonstration Painting
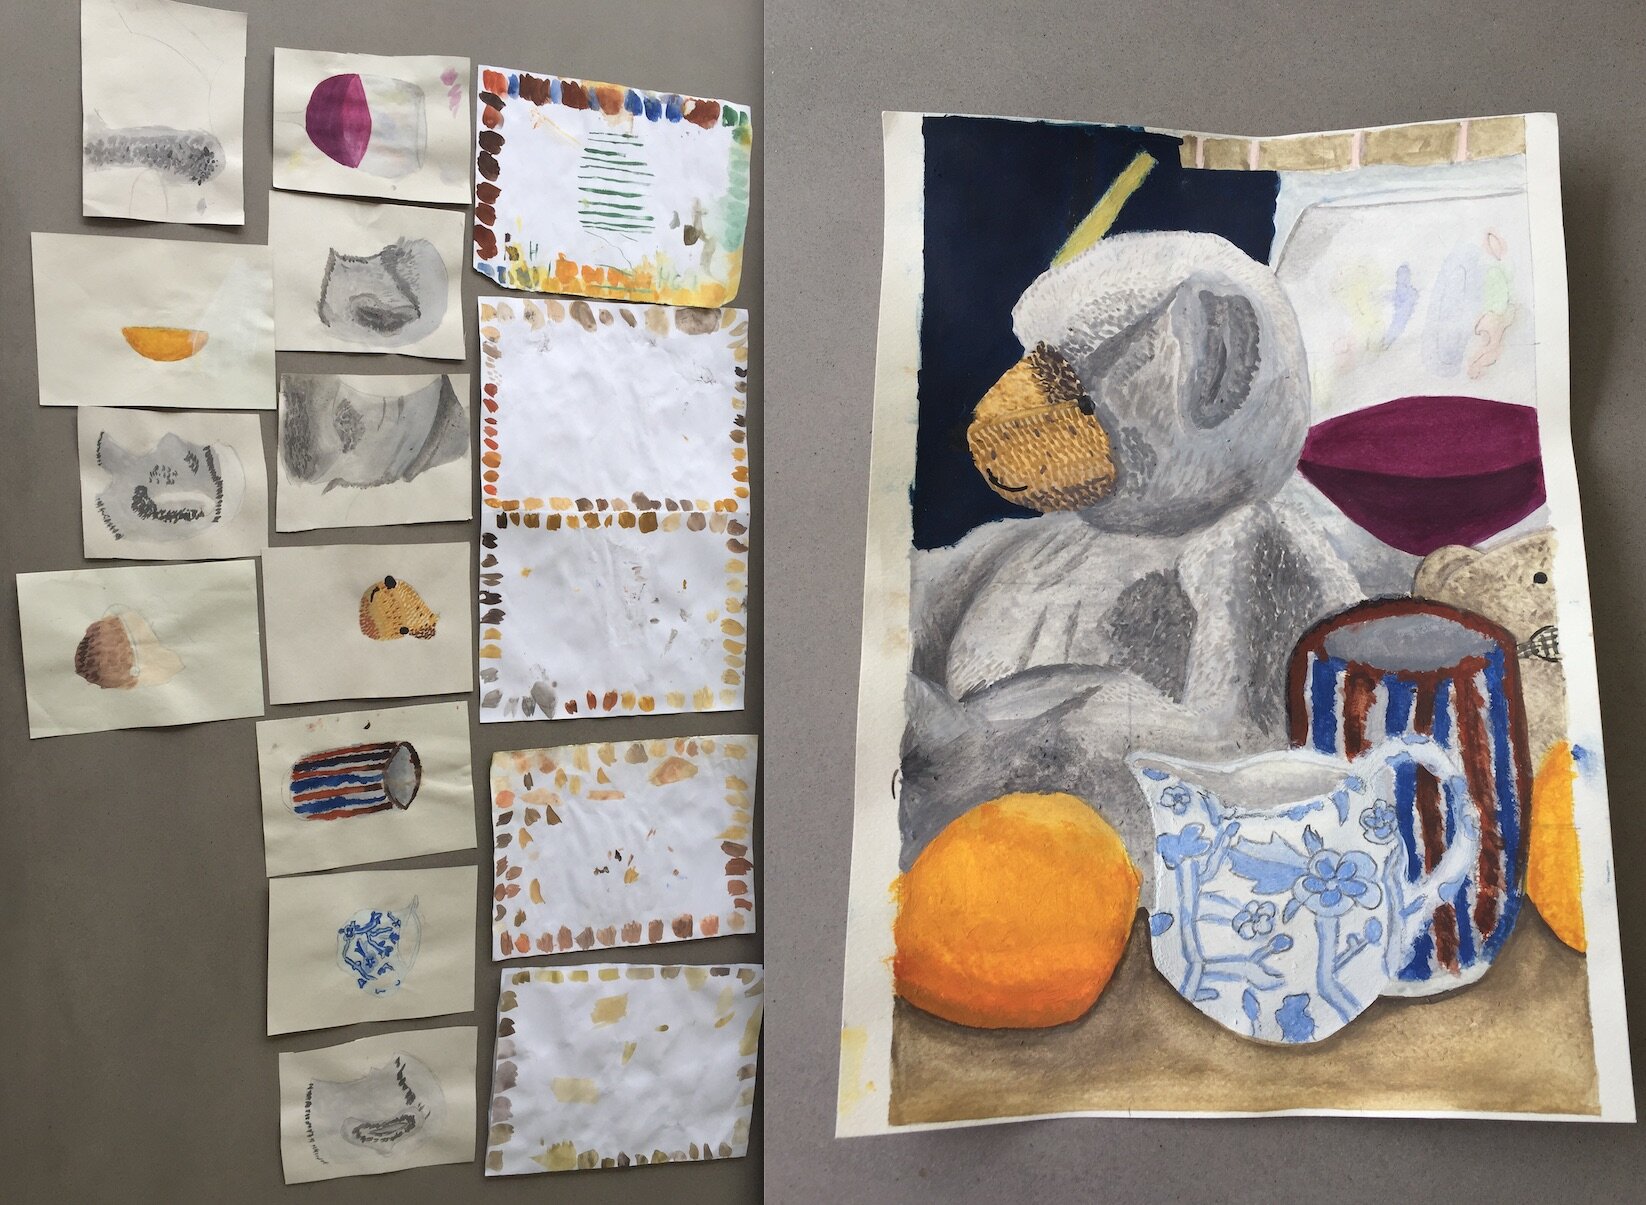
Each object will have a practice painting and test colour sheets before you start on the actual painting. They will look like the examples below.

Homework : Complete painting the first object for your still-life painting. This will be the egg cup or the stripped beaker for most student. Don’t for to keep your practice painting and colour test paper.
Lesson 4
Classwork : Students now should paint the second object for the still-life painting. Remember that the objects must be painted in the following order (so if you started with the egg cup but don’t have the beaker, you should practice and paint the milk jug next). The demonstration videos are shown above in Lesson 6.
egg cup
beaker
milk jug
lemon
orange
It is important that you show the practice painting as well as the painted objects in the final painting. However you do not need to totally complete the practice paintings, but you must demonstrate the skills needed before you paint the final object. You may need to produce more than one practice painting for each object.
Homework : Complete painting the second object for your still-life painting.
Lesson 5
Classwork : Student should paint the third object for the still-life painting. Remember that the objects must be painted in the following order (so if you started with the egg cup but don’t have the beaker, you should practice and paint the milk jug next). The demonstration videos are shown above in Lesson 3.
egg cup
beaker
milk jug
lemon
orange
It is important that you show the practice painting as well as the painted objects in the final painting. However you do not need to totally complete the practice paintings, but you must demonstrate the skills needed before you paint the final object. You may need to produce more than one practice painting for each object.
***NOTE if you do not have a third object from the list you should practice and paint part of one of the following items (Glass with Flowers, Lizard or Wine Glass). See the video demonstrations below.
Homework : Complete painting the third object for your still-life painting.
Lesson 6
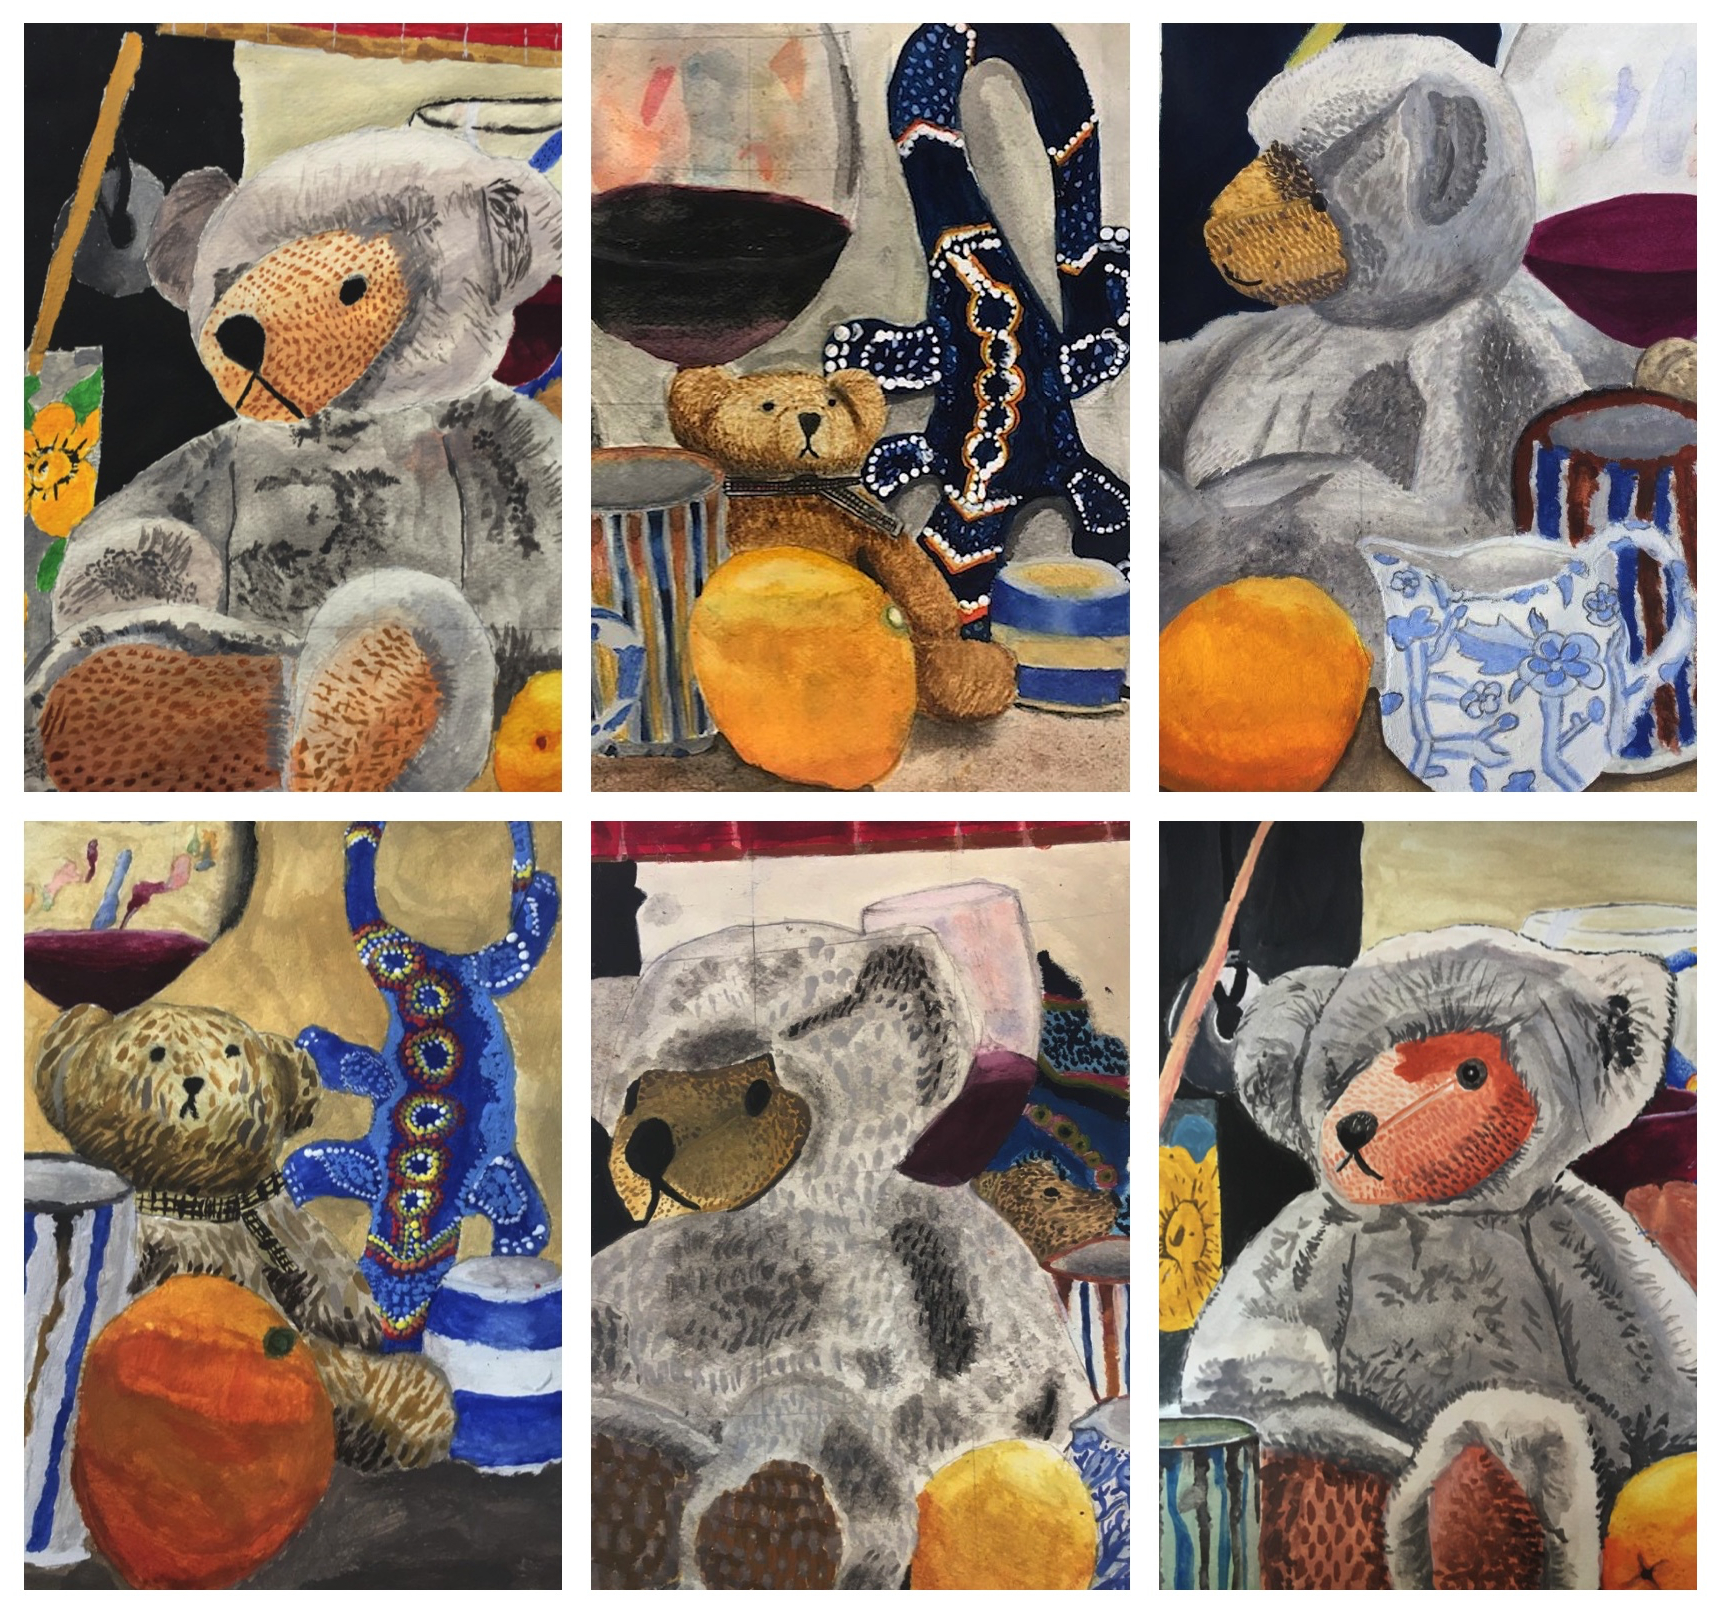
Classwork : Students complete painting all objects (except for the teddy bears) for the still-life painting. Use the demonstration videos shown in the lessons above and don’t forget that it is important that you show the practice painting as well as the painted objects in the final painting. See below some high quality work from previous students, so that you might learn from how other boys have painted certain objects.
Homework : Students complete painting all other objects (except for the teddy bears) for the still-life painting. You teacher may identify some object that you may leave out.
Lesson 7
Classwork : Students paint either the nose of the large teddy bear or the head of the small teddy bear. Use the demonstration videos shown below and don’t forget that it is important that you show the practice painting as well as the painted objects in the final painting.
Large Teddy Bear Nose Fabric Demonstration Painting
Small Teddy Bear Demonstration Painting
Homework : Students complete either the nose of the large teddy bear or the head of the small teddy bear.
Lesson 8
Classwork : Students continue painting the teddy bears still-life painting. In this lesson there will be and emphasis on painting the texture of the teddy bear fur. Students who started the small teddy bear last lesson will already know how to paint the fur for the rest of the body.
Large Teddy Bear Fur Demonstration Painting
Homework : Students complete the teddy bears in their still-life painting, as well as any other objects mentioned by their teacher (remember teachers have told students that they can leave/rub-out some objects). Next lesson will be a final improvement lesson.
Lesson 9
Classwork : Teachers may decide to add an additional lesson to the unit of work if necessary.
The last lesson is a DIRT lesson for improving the teddy bear still-life painting (and painting the background and foreground if necessary..
Some students may wish to start/continue to copy the Lucian Freud’s ‘Girl with a Leaf’ or Albrecht Dürer’s ‘Walrus’ drawing.
Homework : There is no homework. Books will be collected for marking.